DIY Terra Cotta Irrigation Reservoirs for $10
The 2,000-year-old watering trick that keeps roots perfectly hydrated without daily effort
This is one of the oldest irrigation tricks in the world — farmers in ancient China and the Middle East buried unglazed clay pots called ollas next to their crops more than 2,000 years ago and let the porous walls do the watering work for them, seeping moisture slowly and directly to the root zone exactly where plants need it most. The version you can set up today takes 30 minutes, costs $8–15 in terra cotta pots from any garden center, and delivers the same deep, consistent root-zone moisture that expensive drip irrigation systems try to replicate. Because water seeps through the clay walls only as fast as the surrounding soil draws it in, plants never get overwatered and never dry out completely between visits — which is the condition they actually grow best in. It's a natural fit for vegetable beds, established perennials, and any plant that struggles with the feast-or-famine cycle of infrequent deep watering, and it's particularly valuable if you travel, forget to water, or just want your garden to be more self-sufficient through the heat of summer.
What You'll Need
- The Pots
- Unglazed terra cotta pots in 4–6 inch size — the key word is unglazed; glazed pots are sealed and won't seep water through the walls, which defeats the entire purpose (most standard cheap terra cotta pots at garden centers are unglazed and cost $1–3 each)
- One pot per plant for small crops like peppers or eggplant; one pot per every two plants for sprawling crops like tomatoes or squash that have wide root zones
- Larger 8-inch pots work well for established shrubs, fruit trees, or large perennial beds that need a bigger water reservoir between refills
- Sealing Supplies
- Waterproof exterior caulk or plumber's putty to seal the drainage hole at the bottom of each pot — this is the one modification that turns a regular pot into a reservoir that holds water rather than draining it immediately into the soil (~$4–6 for a small tube that seals a dozen pots)
- Alternatively, a cork sized to fit the drainage hole — wine corks fit most standard 4-inch pot drainage holes perfectly and cost nothing if you have them already
- The Cap
- A terra cotta saucer or a flat stone sized to rest over the pot opening — placed on top once the pot is buried and filled, this dramatically reduces surface evaporation and keeps out debris, insects, and curious animals (~$1–2 per saucer, or free if you use flat rocks from the garden)
- Tools
- Trowel or hand spade for digging the installation hole
- Watering can or hose for the initial soil soak and filling
- Optional: A thin wooden skewer or chopstick for checking water level inside the buried pot without removing the cap
- Total Cost
- $8–15 for a set of 4–6 pots with saucers and caulk; often closer to $4–6 if you already own caulk and have flat stones for caps
How to Make and Install Them
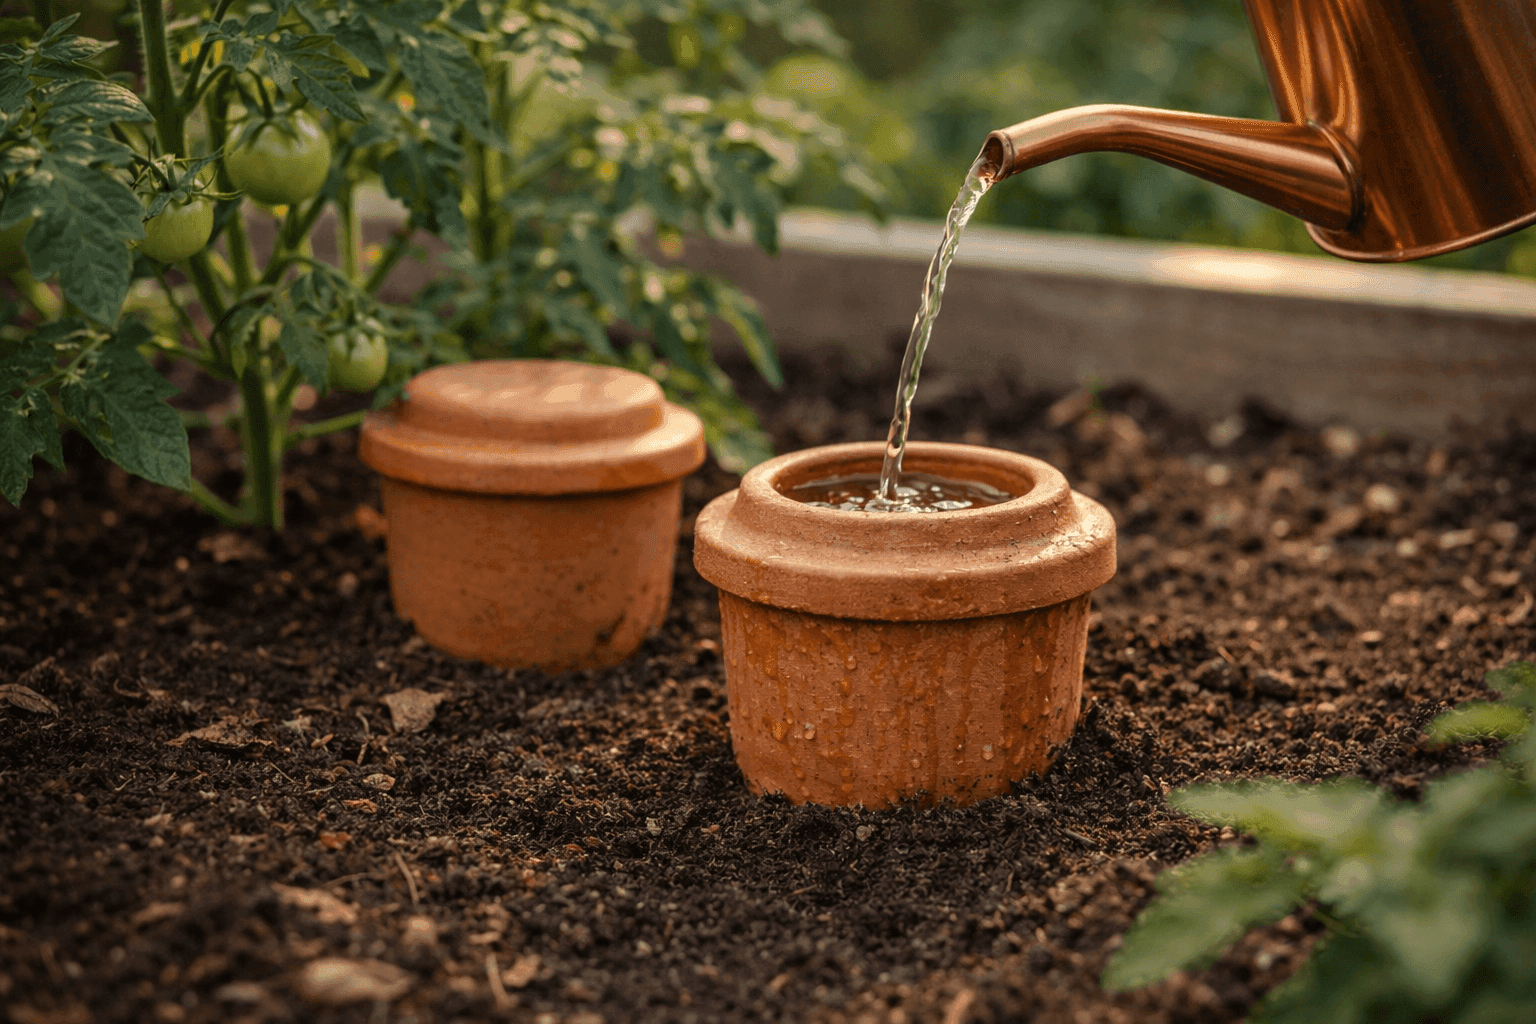
- Seal the drainage hole of each pot before anything else — apply a generous bead of exterior waterproof caulk around the inside of the drainage hole and press a small piece of broken terra cotta or a cork firmly into it, then smooth caulk around the edges to create a watertight seal. Let it cure for the time specified on your caulk packaging, usually 2–4 hours, before filling with water. This step is what converts a standard drainage pot into a water-retaining reservoir.
- Test each pot before burying it by filling with water and setting it on a dry surface for 30 minutes — you should see moisture slowly weeping through the pot walls, but no water draining from the sealed bottom. A properly sealed pot loses water only through the porous clay walls, not the base. If water pools beneath the pot from the bottom, the seal needs reinforcement before installation.
- Choose your planting positions by placing each pot on the soil surface next to the plant it will serve before digging — the ideal position is within 4–6 inches of the plant's main stem, close enough that the root zone sits within the moisture gradient the pot creates in the surrounding soil. For tomatoes and other transplants, install the pot at planting time when disturbing roots is least disruptive.
- Dig the installation hole slightly larger in diameter than the pot and deep enough that only the top 1–2 inches of the pot rim sits above the soil surface. This small exposed rim is what lets you refill the pot easily and check the water level without full excavation. Firm the soil around the pot walls after setting it in place — good contact between the clay and surrounding soil is what enables the moisture transfer to work effectively.
- Water the surrounding soil thoroughly before filling the pot for the first time — the moisture gradient that pulls water through the clay walls only functions when the surrounding soil is already damp. Dry soil draws water out of the pot too rapidly in the first hours of installation, emptying the reservoir before roots can benefit from the slow seep the system is designed to provide.
- Fill the pot slowly to just below the rim using a watering can or a low-flow hose — pouring too fast can disturb the soil seal around the pot walls if the surrounding ground is loose. Place the saucer or flat stone cap over the opening immediately after filling to minimize evaporation from the pot interior, which can account for a significant portion of water loss in hot, dry conditions.
- Establish a refill schedule by checking each pot every two to three days in the first week and noting how quickly it empties in your specific soil and climate conditions. Sandy soils draw water more quickly than clay soils; hot dry weather empties pots faster than cool overcast conditions. Most gardeners find a weekly refill schedule works well once the system is calibrated to their conditions, though a brief check before any multi-day absence from the garden is always worth the 60 seconds it takes.
Market gardeners who use olla irrigation at scale almost always add a small amount of diluted liquid fertilizer to the reservoir water once every two to three weeks during the growing season — a quarter-strength fish emulsion or liquid kelp solution delivers nutrients directly to the root zone through the same slow seep that delivers the water, bypassing the surface application losses that come with foliar feeding. The clay walls filter out larger particles but allow the dissolved nutrients through, meaning you're essentially combining irrigation and feeding into a single low-effort weekly task. It's worth starting with a very dilute solution on one or two test plants first to confirm your specific fertilizer doesn't leave residue that clogs the pot walls over time, which is more common with synthetic liquid fertilizers than organic ones.