Drop Zone: One Landing Spot Ends the Daily Search
A bowl for keys works exactly as well as no bowl at all if keys, sunglasses, and mail each have a different random landing spot every day — the fix isn't a container, it's one fixed location for everything at once.
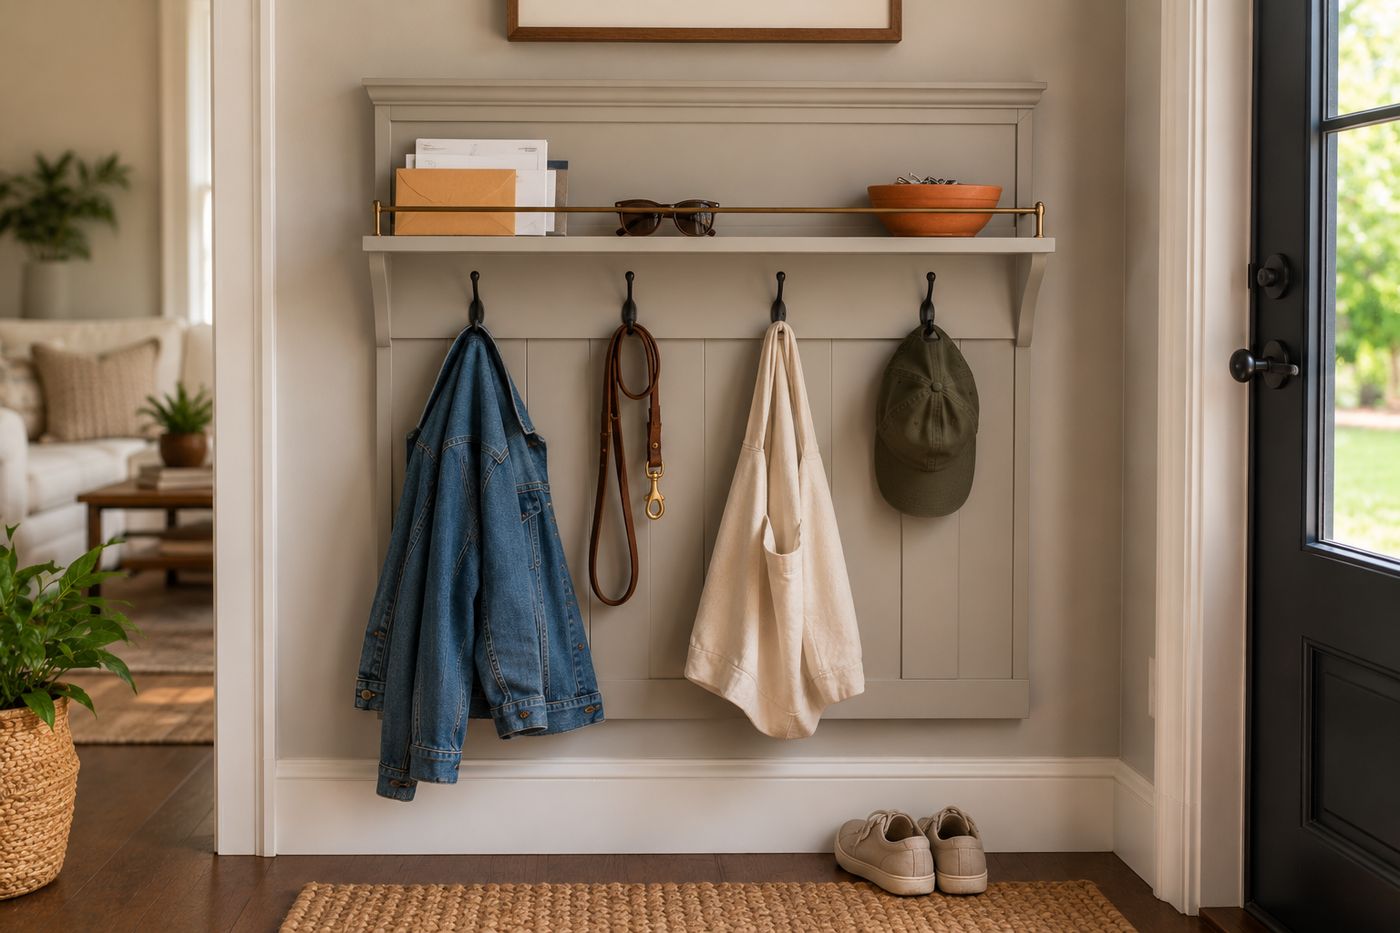
Losing keys every day isn't a memory problem, it's a location problem — without one fixed spot, keys land wherever your hands happen to be free when you walk in, which is different every single time and makes them impossible to find by habit. A wall-mounted drop zone fixes that by giving every category of daily-carry item exactly one designated spot: hooks at a consistent height for bags and jackets, a shallow shelf for anything smaller that needs to leave with you tomorrow. The shelf depth matters more than it seems — about five inches is enough to hold mail and sunglasses without becoming deep enough to bury things at the back where they disappear from view again, which would just recreate the same losing-track problem in miniature. Mounting the whole assembly into wall studs with lag screws, rather than drywall anchors alone, means the hooks can actually be loaded heavily with bags and jackets without ever pulling loose. Get the depth and the anchoring right, and the rest is simple carpentry — about $25 in materials and roughly two hours from cutting the board to the final screw.
What You'll Need
- Pine board, about 36 inches long and 5 inches deep for the shelf — about $10
- Thin trim strip or lip piece, for the front shelf rail — about $2
- Four hooks — about $8 for a set
- Small shelf brackets (2), rated for the weight you plan to load onto the shelf — about $3
- Paint, matched to your trim color if you want the piece to read as architectural — about $2 if not already on hand
- Lag screws, for stud mounting
- Stud finder
- Level
- Drill/driver
How to Build It
- Cut your pine board to about 36 inches long, sized to fit the wall space you've chosen near your entry or garage door.
- Sand the board smooth and paint it in your chosen color, matching your trim if you want the finished piece to read as built-in rather than added on.
- Attach a thin trim strip along the front edge of the shelf portion, creating a small rail that keeps mail and smaller items from sliding off the front.
- Locate two wall studs at your desired mounting height and mark them clearly — this is the anchoring detail that determines whether the hooks can hold real daily weight without pulling loose over time.
- Mount shelf brackets to the studs at your chosen shelf height, checking level before final tightening.
- Attach the painted board to the brackets, confirming it sits level and securely supported.
- Install four hooks evenly spaced below the shelf, driving them into the same stud locations with lag screws rather than drywall anchors alone for full weight capacity.
- Load the finished drop zone by category — keys and small items on the shelf, bags and jackets on the hooks — establishing the habit from day one of everything landing in its designated spot.
Professional organizers who set up household drop zones often add a small key hook directly at the shelf's edge, separate from the main row of coat and bag hooks, because keys specifically need a spot that's fast to reach with one hand while still holding something else, rather than being grouped in with the larger items that require both hands to hang properly. That small separation is often the detail that makes people actually use the key spot consistently instead of setting keys down on the shelf itself out of habit.