Elevated Growing: Design and Build Perfect Raised Garden Beds
Create beautiful, productive growing spaces that improve yields and reduce maintenance

Raised garden beds offer numerous advantages over traditional in-ground gardens—they provide better drainage, prevent soil compaction, extend the growing season, and create accessible growing spaces that are easier on your back and knees. These elevated growing areas also establish clear boundaries that minimize weeds and prevent lawn encroachment while creating an attractive, organized landscape feature. With basic carpentry skills and the right materials, you can build custom raised beds perfectly suited to your space, gardening needs, and aesthetic preferences.
Materials & Tools
| • Lumber (cedar, redwood, or composite) |
| • Galvanized screws or deck screws |
| • Corner brackets (optional) |
| • Drill/driver and bits |
| • Saw (circular or miter) |
| • Measuring tape and level |
| • Landscape fabric (weed barrier) |
| • Quality soil mix for raised beds |
Construction Process
- Design thoughtfully: Plan beds that are no wider than 4 feet to ensure you can reach the center from either side without stepping in the bed. Length can vary based on your space, but 8-foot sections use standard lumber efficiently. For depth, 10-12 inches accommodates most vegetables, while 18-24 inches is ideal for root crops.
- Choose appropriate materials: Select naturally rot-resistant woods like cedar or redwood for longevity, or consider composite lumber for maximum durability. Avoid pressure-treated lumber for food gardens due to potential chemical concerns.
- Prepare the site: Clear the area of grass and weeds, then level the ground where your bed will sit. For beds placed on existing lawn, line the bottom with cardboard to smother grass before adding landscape fabric.
- Assemble the frame: Cut lumber to your desired dimensions, then construct a rectangular frame using galvanized screws or deck screws at the corners. Add corner brackets for additional stability if desired. For beds taller than 12 inches, include middle supports along the sides to prevent bowing.
- Fill with quality soil: Line the bottom with landscape fabric to prevent weeds, then fill with a high-quality raised bed soil mix. Create a slight mound in the center as soil will settle over time. Avoid using soil directly from your garden, which may contain weeds, pests, or diseases.
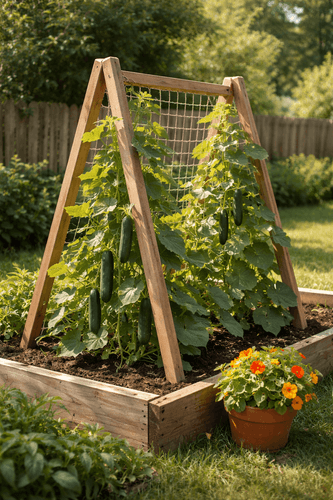
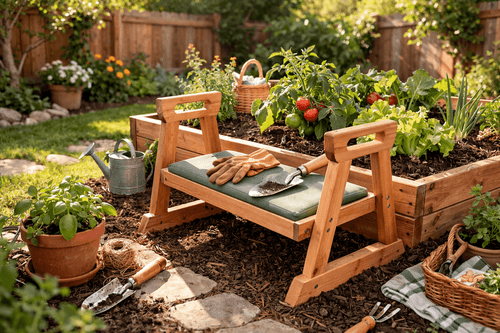
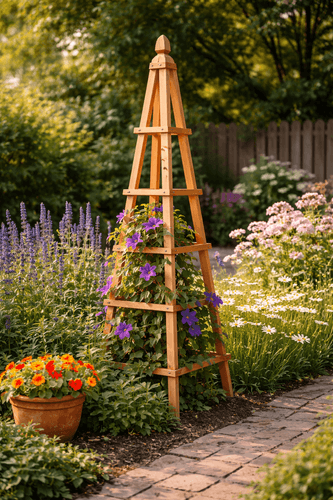
Consider the visual impact of your raised beds within your overall landscape design—arrange multiple beds in symmetrical patterns with defined pathways between them for a formal garden look, or create tiers of different heights for visual interest on sloped yards. For maximum productivity in limited space, incorporate trellises or cattle panel arches between beds to provide vertical growing space for vining crops like cucumbers and beans. Add functional design elements like integrated seating by extending the width of one side to create a bench, or install a ledge around the perimeter for setting down tools while working. For convenient watering, consider embedding soaker hoses or drip irrigation systems during construction.