Garden Beauty: Create Weatherproof Markers From Free Stones
Paint charming plant labels before spring planting season begins
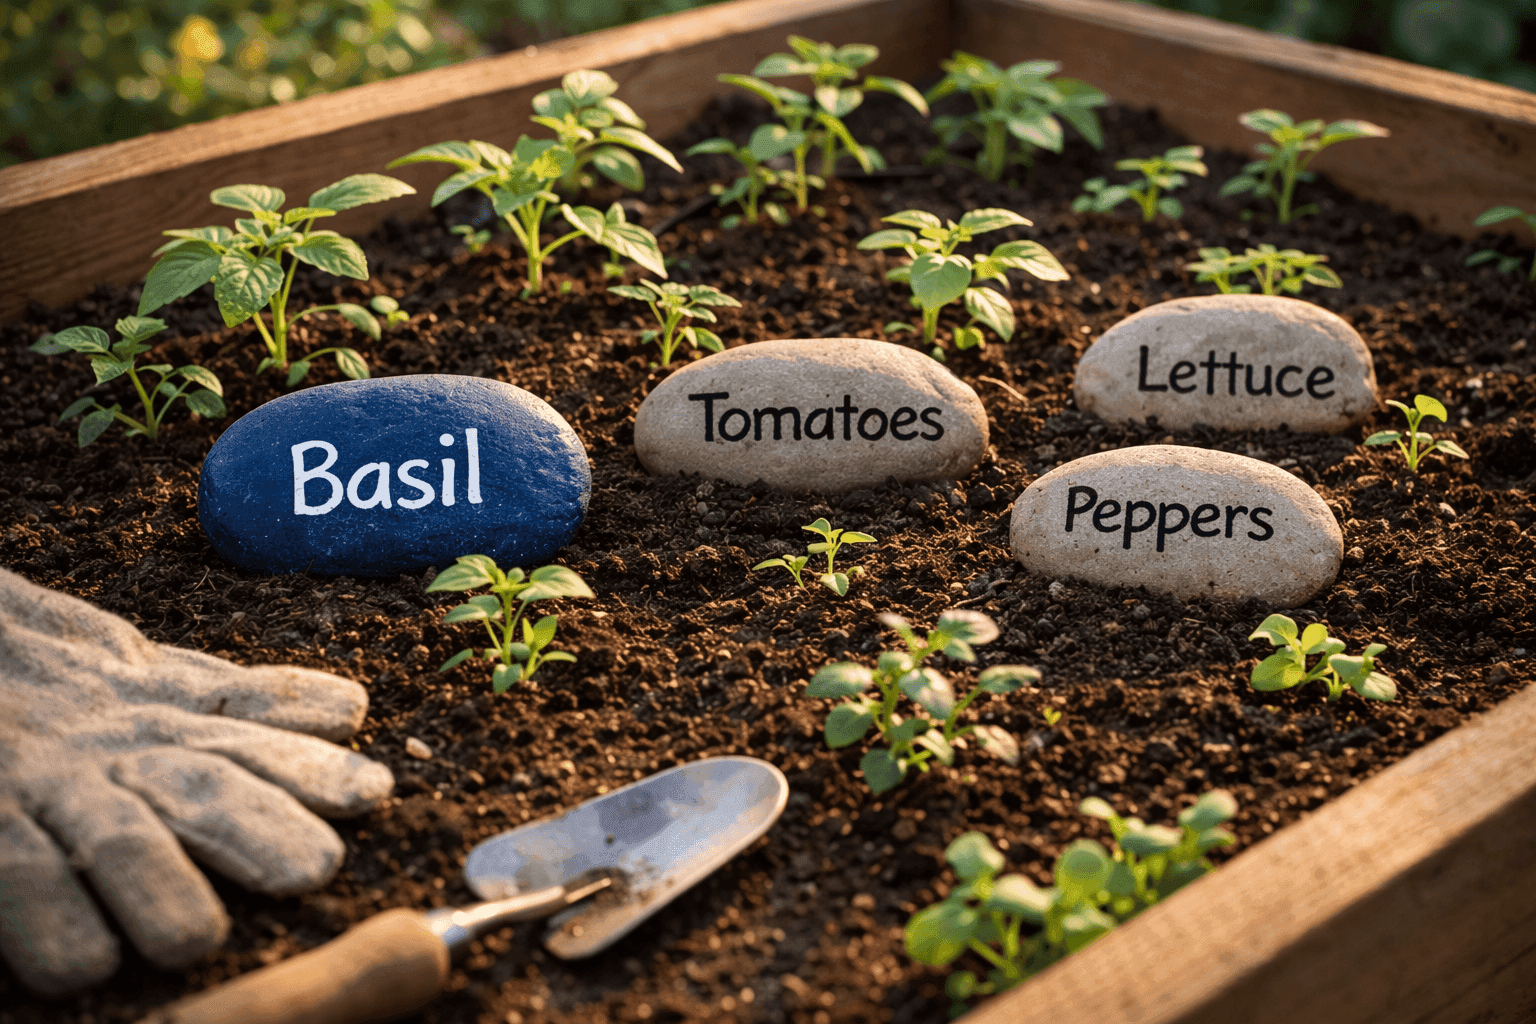
Generic plastic plant markers fade, crack, and look cheap in gardens where you've invested time nurturing vegetables and herbs worth identifying beautifully, while fancy store-bought markers cost $2-4 each for what amounts to decorative labels. Painted stone garden markers transform free smooth rocks into charming weatherproof plant labels that add rustic personality to gardens while costing under $10 for supplies that create 20-30 markers—essentially free compared to commercial alternatives. This one-hour winter project prepares you for spring planting season by creating an entire collection of labeled markers ready when seedlings go into the ground, eliminating the rushed scramble to identify plants after they're already growing and looking similar. The stones themselves are typically free—collected from nature walks, beaches, riverbeds, or even your own yard—making this truly budget-friendly while the hand-painted aesthetic adds personal touches that mass-produced markers simply cannot match. Beyond vegetables, these markers work beautifully for herb gardens, flower beds, houseplants, or marking tree varieties in yards where you want to remember what's planted where without consulting notes or relying on increasingly unreliable memory. The painting process itself is meditative and satisfying, offering creative outlet during winter months when actual gardening remains weeks away but anticipation builds for the growing season ahead that these markers will help organize and beautify.
What You'll Need
- Stone Foundation (free):
- 20-30 smooth, flat stones (2-4 inches)
- Collect from nature walks, rivers, beaches, or yards
- Look for light-colored stones that show writing well
- Relatively flat surfaces work best for lettering
- Painting Supplies ($8-10):
- Acrylic paint in contrasting colors (black, white, dark green)
- Fine-tip paint pens or small brushes for lettering
- Optional: base coat paint if stones need coverage
- Clear outdoor sealer spray or brush-on for weatherproofing
- Preparation Tools:
- Soap and water for cleaning stones
- Scrub brush for removing dirt
- Towels for drying
- Pencil for sketching letters first (optional)
- Plant Name Ideas:
- Vegetables: Tomatoes, Peppers, Lettuce, Carrots, Beans
- Herbs: Basil, Rosemary, Thyme, Cilantro, Parsley
- Flowers: Marigolds, Zinnias, Sunflowers
- Consider varieties: "Cherry Tomatoes," "Sweet Basil"
Create Your Markers
- Collect smooth, relatively flat stones during nature walks or from your own yard, selecting light-colored rocks that will show dark lettering clearly without requiring base coat paint layers.
- Wash stones thoroughly with soap and water using a scrub brush to remove dirt, moss, algae, and oils that prevent paint from adhering properly—clean stones are critical for long-lasting markers.
- Dry completely, waiting at least several hours or overnight to ensure no moisture remains that could interfere with paint adhesion or cause sealer to bubble and peel prematurely.
- Apply base coat of white or light paint if your stones are too dark for lettering to show clearly, allowing each coat to dry completely before adding additional layers for opacity.
- Sketch plant names lightly in pencil first if you're uncertain about lettering—this allows corrections before committing to permanent paint, especially helpful for longer words or decorative script styles.
- Paint plant names using fine-tip paint pens or small brushes with steady hands, working slowly and deliberately to create legible lettering that will remain readable throughout the growing season and beyond.
- Add simple decorative elements if desired—small vegetables icons beside names, herb leaves, or colorful borders that enhance visual appeal while maintaining primary function of clear identification.
- Seal completely dry painted markers with clear outdoor sealer spray or brush-on polyurethane, applying 2-3 coats for maximum weatherproofing that protects lettering from rain, sun, and repeated watering throughout growing seasons.
Master gardeners create the most functional markers by painting on both sides of stones—plant name on top for identification while working in gardens, and planting date or variety details on bottom for record-keeping without cluttering visible surfaces. For a cohesive garden aesthetic, paint all markers in matching color schemes or styles rather than random variations that look haphazard—all white stones with black lettering, all natural stones with green text, or coordinating painted backgrounds create visual unity. Consider painting broader category markers for garden sections—"Tomatoes," "Herbs," "Salad Greens"—using larger anchor stones, then creating smaller individual variety markers that provide specific identification within those zones. Paint extra blank markers or stones with "Plant Name" templates that you can fill in with dry-erase markers or paint pens season-to-season, creating flexibility for crop rotation without needing new permanent markers annually. For raised beds or container gardens, paint matching sets that identify not just plants but also planting dates and harvest windows, transforming simple markers into complete garden management tools. Store unused markers in a dedicated container between seasons, protecting them from weather when not actively identifying plants—this extends their lifespan indefinitely while keeping them organized and ready for next year's planting without needing to create entirely new batches every spring.