Garden Gateway: Build a Stunning Grape Arbor for Next Year
Plant the seeds of next summer's shaded paradise with this weekend construction project
Building a grape arbor is like planting a time capsule for your future self – you're creating the framework for years of shaded summer afternoons and hopefully some homemade wine! I built my first arbor three years ago, and watching it transform from bare wooden bones into a lush, productive canopy has been one of my most rewarding garden projects. There's something incredibly satisfying about constructing something that gets more beautiful and functional with each passing season. Fall is actually the perfect time for this project because you can get the structure completed and plants established before winter, giving everything a head start for explosive spring growth. Plus, there's nothing quite like sipping morning coffee under your own grape-covered pergola, knowing you built the whole magical space with your own hands!
Materials & Hardware
- Frame Structure: Pressure-treated 4x4 posts for uprights, 2x8 beams for top frame ($120-180)
- Trellis Materials: Lattice panels or galvanized wire mesh for climbing support ($60-100)
- Hardware: Galvanized bolts, screws, joist hangers, post anchors ($40-60)
- Foundation: Concrete mix for post setting, gravel for drainage ($30-50)
- Tools: Post-hole digger, level, circular saw, drill, measuring tape
- Optional Upgrades: Cedar lumber for weather resistance, decorative brackets ($50-100)
- Plants: Grape vines or ornamental climbing plants for immediate planting ($30-80)
Construction Process
- Plan your arbor location considering sun exposure, drainage, and mature plant size
- Mark post positions and dig holes 2-3 feet deep, depending on local frost line
- Set corner posts in concrete, ensuring they're plumb and properly spaced
- Install top frame beams using joist hangers or notched connections for stability
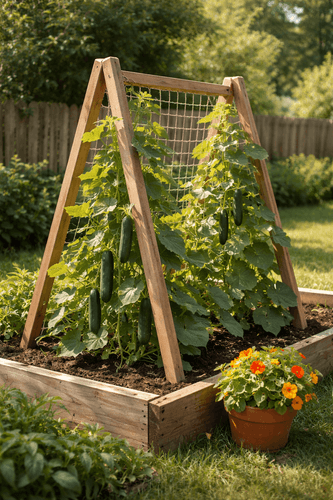
- Add cross supports and trellis framework to provide climbing structure
- Attach lattice panels or wire mesh, tensioning properly for plant support
- Apply weather-resistant stain or sealant to protect wood from elements
- Plant grape vines or climbing plants at base, mulching well for winter protection
Master gardeners know that the secret to a successful arbor is thinking beyond just structure – you're creating a microclimate that will evolve over years. Position your arbor to take advantage of prevailing breezes for natural cooling, but protect it from harsh winter winds. Here's my favorite professional trick: install a drip irrigation system during construction, running lines along the top beams before adding the final trellis work. This hidden system ensures consistent watering as your plants establish and mature. Also, consider the "golden ratio" for spacing – make your arbor opening about 1.6 times wider than it is tall for the most pleasing proportions that photograph beautifully and feel naturally inviting!