Install Neon Rope Light Garden Borders for $35
Hot pink, electric blue, or color-shifting RGB — the garden border that turns your yard into an after-dark destination
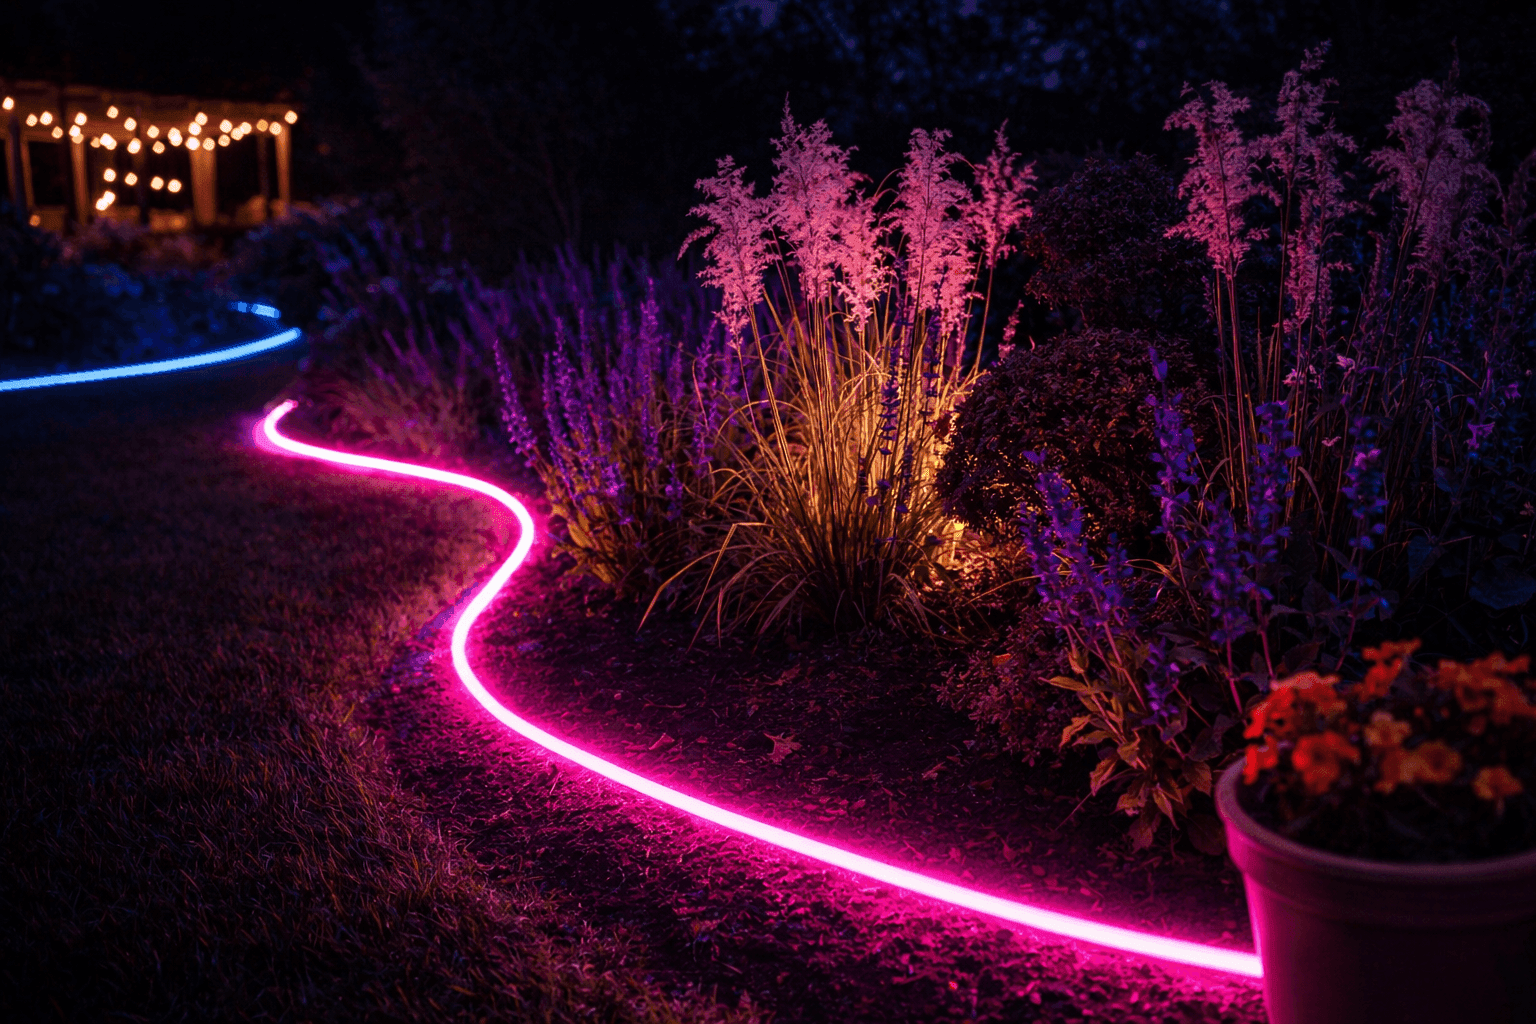
Solar stake lights are fine. They are inoffensive and forgettable and they make your garden look like every other garden on the street after dark. LED neon rope lights along your garden bed borders are something else entirely — a glowing, color-saturated ground-level installation that defines your bed edges in hot pink or electric blue while casting dramatic uplight through the foliage above it, turning plants you walk past without noticing in daylight into silhouetted and illuminated focal points that make your yard an actual destination after dark. The installation is straightforward, the rope lights are rated for outdoor use, and the whole project runs $35 to $50 depending on how many linear feet of border you're treating. This is unapologetically bold garden design for people who believe that their outdoor space should be as interesting at 9pm as it is at 9am — and who are completely done apologizing for wanting their garden to look extraordinary rather than simply tidy.
What You Need
- LED neon flex rope lights, outdoor-rated — look specifically for IP65 or IP67 waterproof rating; unrated or indoor LED strips will fail in outdoor moisture conditions within weeks regardless of how dry the installation looks during setup (~$20–35 for a 16-foot length depending on color and quality)
- Color selection — hot pink, electric blue, and lime green are the most dramatically saturated single-color options; RGB color-changing strips controlled by a remote or app give you the flexibility to shift the mood of your garden from night to night (~$5–10 more for RGB over single-color)
- Landscape staples or rope light ground clips — U-shaped landscape staples anchor the rope at ground level while allowing it to follow natural bed curves; purpose-made rope light clips grip the rope more securely than staples on very flexible installations (~$4–6 for a pack of 50)
- Waterproof LED connectors — for joining multiple rope light sections without visible cord runs between them; waterproof versions rated to match your rope light's IP rating are essential for outdoor joins that will be exposed to rain (~$6–10 for a connector pack)
- Outdoor extension cord or solar battery pack — for powering the installation from an existing outdoor outlet; a solar-charged rechargeable battery pack eliminates cord management entirely for installations far from outlets (~$15–25 for a capable solar pack)
- Measuring tape — for calculating total linear footage of bed border before purchasing rope lights; running short leaves a gap in the installation that is both visually jarring and functionally incomplete
- Rubber mallet — for driving landscape staples through the rope light mounting tabs into the soil without damaging the light body
How to Install It
- Measure the full perimeter of every garden bed border you plan to light before purchasing a single foot of rope, mapping the layout on paper and noting any gaps, corners, or areas where the rope will need to turn sharply. Flexible LED neon rope has a minimum bend radius — typically two to four inches — and forcing it into tighter curves creates internal stress on the LED strip that causes premature failure at the bend points within one to two seasons.
- Confirm your power source locations before finalizing the installation route — the rope light's power connection end needs to reach an outdoor outlet or solar pack without a visible cord run crossing the lawn or pathway. Plan the installation route so the power connection end terminates at the nearest available power point, which may mean starting the rope run from the power source and working outward rather than starting at the most visually logical point of the border.
- Unroll the rope light fully and allow it to relax to room temperature before installation if it has been stored coiled — cold, tightly coiled LED rope has memory in the outer casing that causes it to resist lying flat against the ground and creates lifting sections that look untidy and lose their ground-contact illumination effect. Unrolling and allowing the rope to relax for thirty minutes produces a dramatically more cooperative installation.
- Position the rope along the bed border edge before securing anything, pressing it gently into the soil at the precise position you want it and standing back to assess the line from multiple viewing angles — the flowing, organic curve that looks intentional and beautiful when viewed from the house may look rigid and straight from the patio, and adjusting the route before the first staple goes in costs nothing while adjusting after the rope is anchored means removing and redriving every staple in the section.
- Secure the rope with landscape staples or ground clips every twelve to eighteen inches along straight sections and every six to eight inches around curves, driving each staple over the rope body or through the clip mounting tab with a rubber mallet rather than a metal hammer that would crack the rope's outer casing at the contact point. The staple spacing at curves is the detail that determines whether your curved bed edges look like flowing, intentional arcs or like a rope that's been grudgingly bent into shape and is visibly trying to straighten itself out.
- Join multiple rope sections with waterproof LED connectors at any point where the border requires more than one length of rope, ensuring both sections are powered off before making any connection. A waterproof connector rated to the same IP standard as your rope light is not optional for outdoor joins — a standard electrical connection exposed to rain fails and shorts within the first wet season, and the failure mode is a dead section of border that requires reopening a buried or stapled run to repair.
- Test the full installation at ground level before covering any connections or finalizing staple placement — walk the border in both directions checking for sections where the rope has lifted away from the soil, connectors that haven't fully clicked into position, or curves where the rope is pulling against its staples rather than lying flat. Corrections are straightforward before the installation is finalized and significantly more disruptive after.
- Evaluate the finished installation after dark before declaring the project complete — power on the rope lights at full dark and walk the yard from every key viewing position: the house windows, the patio seating area, and the garden entry point. The illumination effect at ground level looks entirely different in darkness than it does in daylight, and a section that appeared perfectly positioned during installation sometimes reads as too bright, too dim, or aimed in an unexpected direction once the ambient light is gone and the rope is the primary light source in the space.
Professional landscape lighting designers who work with LED installations always create what they call a light layering plan before installing any ground-level fixture — they map the installation so that the rope light border illuminates upward into plants with interesting silhouettes (ornamental grasses, sculptural shrubs, tall perennials) rather than running along the base of low groundcover where the light has nowhere interesting to go. The drama in a neon rope border installation comes entirely from the contrast between the vivid ground-level glow and the plants dramatically backlit and uplit above it, and that contrast is maximized by positioning the rope immediately inside the bed edge where tall plants begin rather than at the outermost bed border where the light faces open lawn. A five-minute review of your plant heights along each border section before you drive the first staple is what separates a rope light installation that looks like a showstopping art installation from one that looks like a well-lit driveway.