
DIY Projects

Recent Content

Wooden Dish Rack: The Dowel Angle That Drains Right

Wooden Dish Rack: The Dowel Angle That Drains Right

Build a slatted wood dish rack for $18—the dowel tilt angle is what actually drains water into the tray instead of pooling on your counter.

Install a Fireplace Draft Stopper in 20 Minutes for $25

Install a Fireplace Draft Stopper in 20 Minutes for $25

Stop your chimney from sucking heat right out of the house—an inflatable draft stopper seals it in 20 minutes for about $25.

The Shower Rod Trick That Fakes a Walk-In Closet

The Shower Rod Trick That Fakes a Walk-In Closet

Steal spare closet space with a second shower-curtain rod—zero holes, zero fuss, and your full deposit stays safe.

Pool Noodle Knife Block: The Slice Depth That Stops Wobble

Pool Noodle Knife Block: The Slice Depth That Stops Wobble

Turn a $1 pool noodle into a safe knife block—the slice depth is what keeps blades from wobbling loose or slicing through the foam.

Build a Wooden Pie Carrier in 2 Hours for $25

Build a Wooden Pie Carrier in 2 Hours for $25

Never smash a pie in the car again! Build a snug wooden pie carrier in 2 hours for $25—perfect timing for fall potlucks.

logo
  • Home Improvement
  • DIY Projects
  • Interior Design
  • Gardening & Outdoor
  • Real Estate
  • Home Improvement
  • DIY Projects
  • Interior Design
  • Gardening & Outdoor
  • Real Estate
  • ​

Sweater Cozies: Why Wool Doesn't Fray Like Fabric

Cut knit fabric doesn't unravel thread by thread the way woven fabric does — it's what lets you skip hemming certain edges entirely, and knowing which cuts need finishing and which don't is what makes this whole project so fast.
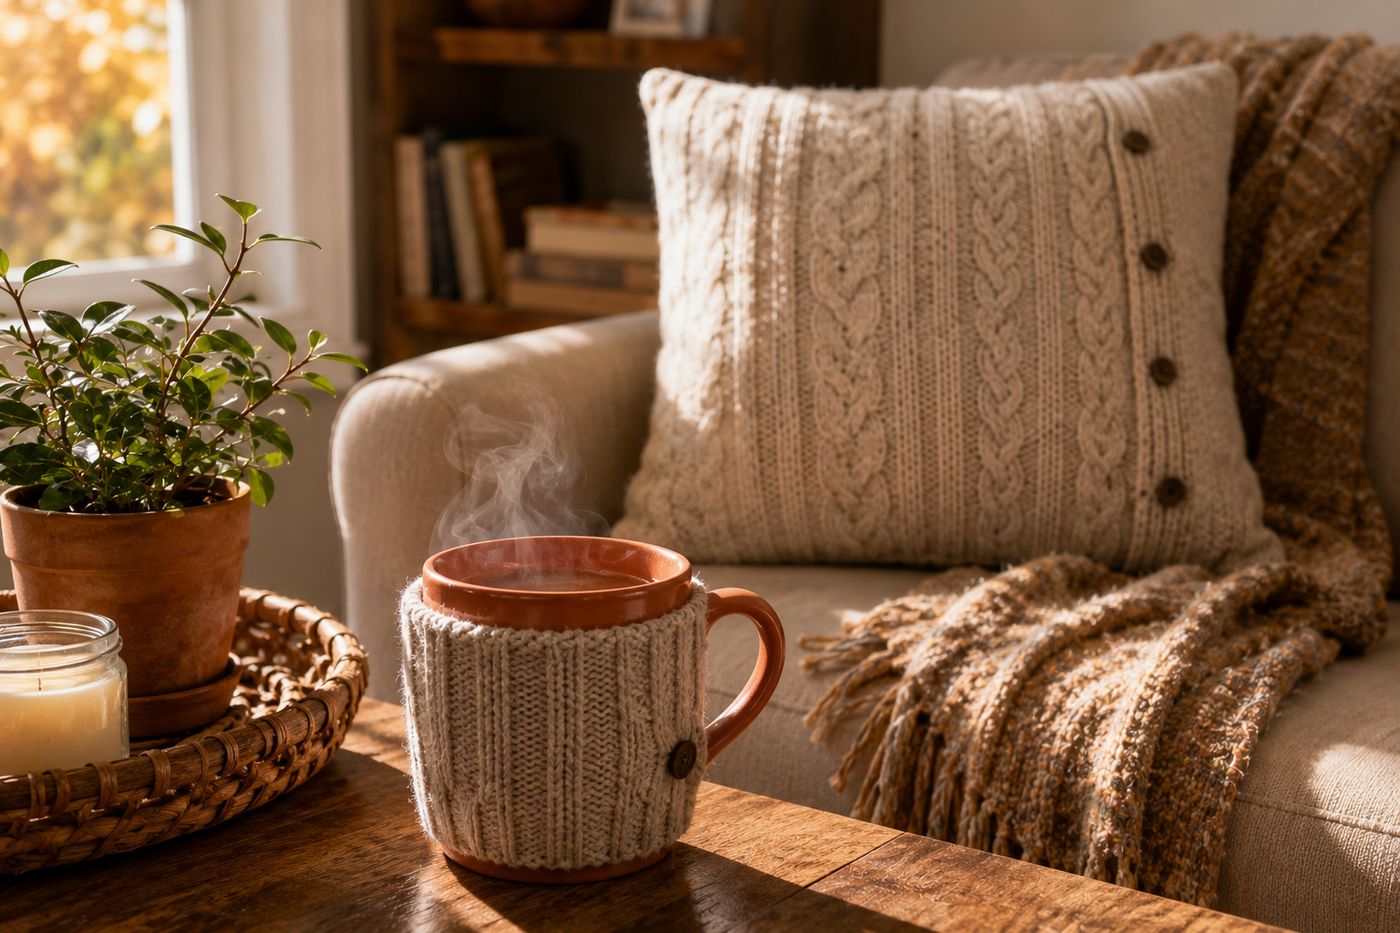
A cozy knit mug warmer made from a repurposed sweater sleeve, paired with a knit sweater pillow cover on a couch
DIY Projects

Woven fabric unravels along a cut edge because individual threads have nothing holding them to their neighbors once severed, which is why most sewing projects require hemming every raw edge to prevent fraying. Knit fabric, the structure of a sweater, is built from interlocking loops rather than individual crossing threads, and cutting through it doesn't create the same loose-thread unraveling — a cut knit edge might curl slightly, but it won't progressively fray the way woven fabric does. That structural difference is the actual reason sweater upcycling projects move so much faster than typical sewing: you can often skip formal hemming on edges that will be tucked into a seam or secured with a closure, relying on the fabric's own knit structure to stay intact rather than needing to fold and stitch every raw edge for durability. Using the sweater's existing cuff as a pre-finished edge on a mug cozy takes that same principle even further, since it's already a stable, finished edge with zero work required. Understanding what knit fabric actually needs versus what it doesn't is what makes a batch of mug cozies and a pillow cover come together in about 90 minutes, mostly from sweaters already sitting in a closet.

What You'll Need

  • Worn or thrifted sweaters, cable knit, fair isle, or soft textures work well — free, already owned, or a couple dollars thrifted
  • Buttons and ribbon or elastic, for mug cozy closures — about $3
  • Sewing machine or needle and thread
  • Pillow form (if making pillow covers), sized to your sweater panel
  • Scissors or fabric shears
  • Pins or fabric clips
  • A mug, for measuring cozy dimensions

How to Do It

  1. Choose a sweater with a texture and weight that feels right for your project — thicker cable knits for pillow covers and lap blankets, ribbed sleeves specifically for mug cozies since the stretch conforms well around a mug.
  2. Cut a strip from a sweater sleeve sized to wrap around your mug, using the existing cuff as one already-finished edge whenever possible to save a hemming step.
  3. Hem only the cut edge that isn't the original cuff, since knit fabric won't progressively fray the way woven fabric does, but a light hem still keeps the edge from curling over time with repeated use.
  4. Add a button and loop closure, or a piece of ribbon, to secure the cozy around the mug.
  5. Cut the body of a sweater to your desired pillow cover size, adding a small seam allowance on each side.
  6. Sew three sides together with right sides facing, leaving one side open for the pillow form.
  7. Insert the pillow form through the open side, then stitch the final side closed.
  8. Repeat the process across multiple sweaters for a coordinated set of cozies and cushions, or sew several soft sweater panels together patchwork-style for a lap blanket.
DESIGNER TIP

Fiber crafters who upcycle sweaters regularly often cut their pieces on a stable, flat surface with fabric weights instead of pins, rather than trying to cut a stretchy knit garment held in hand, since knit fabric shifts and stretches under handling in a way that woven fabric doesn't, and an uneven cut on a stretchy material is much harder to correct afterward than on a stable woven fabric.


Related Content

DIY Projects

28 October 2026

Post

Wooden Dish Rack: The Dowel Angle That Drains Right

Build a slatted wood dish rack for $18—the dowel tilt angle is what actually drains water into the tray instead of pooling on your counter....

DIY Projects

27 October 2026

Post

Pool Noodle Knife Block: The Slice Depth That Stops Wobble

Turn a $1 pool noodle into a safe knife block—the slice depth is what keeps blades from wobbling loose or slicing through the foam....

DIY Projects

27 October 2026

Post

Build a Wooden Pie Carrier in 2 Hours for $25

Never smash a pie in the car again! Build a snug wooden pie carrier in 2 hours for $25—perfect timing for fall potlucks....

DIY Projects

26 October 2026

Post

Make Herb-Infused Honey in 30 Minutes for $12

Turn raw honey into a cold-season secret weapon—infuse it with thyme and ginger in 30 minutes for about $12, no fancy gear needed....

DIY Projects

25 October 2026

Post

Make Homemade Fire Cider in 20 Minutes for $15

Steep this spicy apple cider vinegar tonic now so it's ready to fight off fall colds in 4 weeks—20 minutes, $15, zero cooking skills....

DIY Projects

23 October 2026

Post

Build a Freestanding Coat Rack in 2 Hours for $35

Sick of coats piled on chairs? Build a sturdy freestanding coat rack in 2 hours for $35 — no wall drilling, just solid joinery....

DIY Projects

22 October 2026

Post

Window Frame to Pet Gate: The Hinge Set That Holds

Turn an old wooden window frame into a swinging pet gate for $22 — the hinge mortise depth is what keeps it from sagging open over time....

DIY Projects

22 October 2026

Post

Make Spiced Homemade Applesauce in 1 Hour for $12

Turn a bag of fall apples into silky spiced applesauce in an hour for $12 — no peeling required if you've got the right tool....

DIY Projects

21 October 2026

Post

Floating Nightstand: The Bracket Depth That Holds Weight

Build a wall-mounted wooden nightstand for $25 — the bracket depth inside the wood is what stops it from sagging under a lamp and books....

DIY Projects

20 October 2026

Post

Foam Letter Wall Art: The Spacing Trick for $6

Turn dollar-store foam letters into custom nursery wall art for $6 — the spacing template is what keeps names looking store-bought, not crooked....

DIY Projects

19 October 2026

Post

Build a Tabletop Fire Bowl in 90 Minutes for $35

Turn a $35 metal bowl and lava rock into a tabletop fire feature perfect for crisp fall evenings and s'mores nights....

DIY Projects

16 October 2026

Post

Build a Pet Food Storage Bin in 1 Hour for $30

Stop losing the war against stale kibble and pantry moths—build an airtight pet food bin in an hour for $30....

DIY Projects

15 October 2026

Post

Whittling a Wooden Spoon

Try meditative spoon whittling for under $15—cutting with the grain (not against it) is the one rule that keeps your blank from splitting mid-carve....

DIY Projects

14 October 2026

Post

Wooden Pet Ramp: The Cleat Spacing That Stops Slips

Build a wooden pet ramp for $20 — the traction cleat spacing is what keeps your dog's paws from sliding on the incline....

DIY Projects

13 October 2026

Post

Build a Compost Sifter Box in 1 Hour for $18

Turn chunky compost into fine garden gold! Build a simple hardware-cloth sifter box in an hour for $18—no more rock-and-stick surprises....
Terms and ConditionsDo Not Sell or Share My Personal InformationPrivacy PolicyPrivacy NoticeAccessibility NoticeUnsubscribe
Copyright © 2026 DIY HomeBoost












