


Bottle Brilliance: Craft Elegant Wine Bottle Torches
Transform empty wine bottles into sophisticated outdoor torches that provide ambiance and natural bug protection
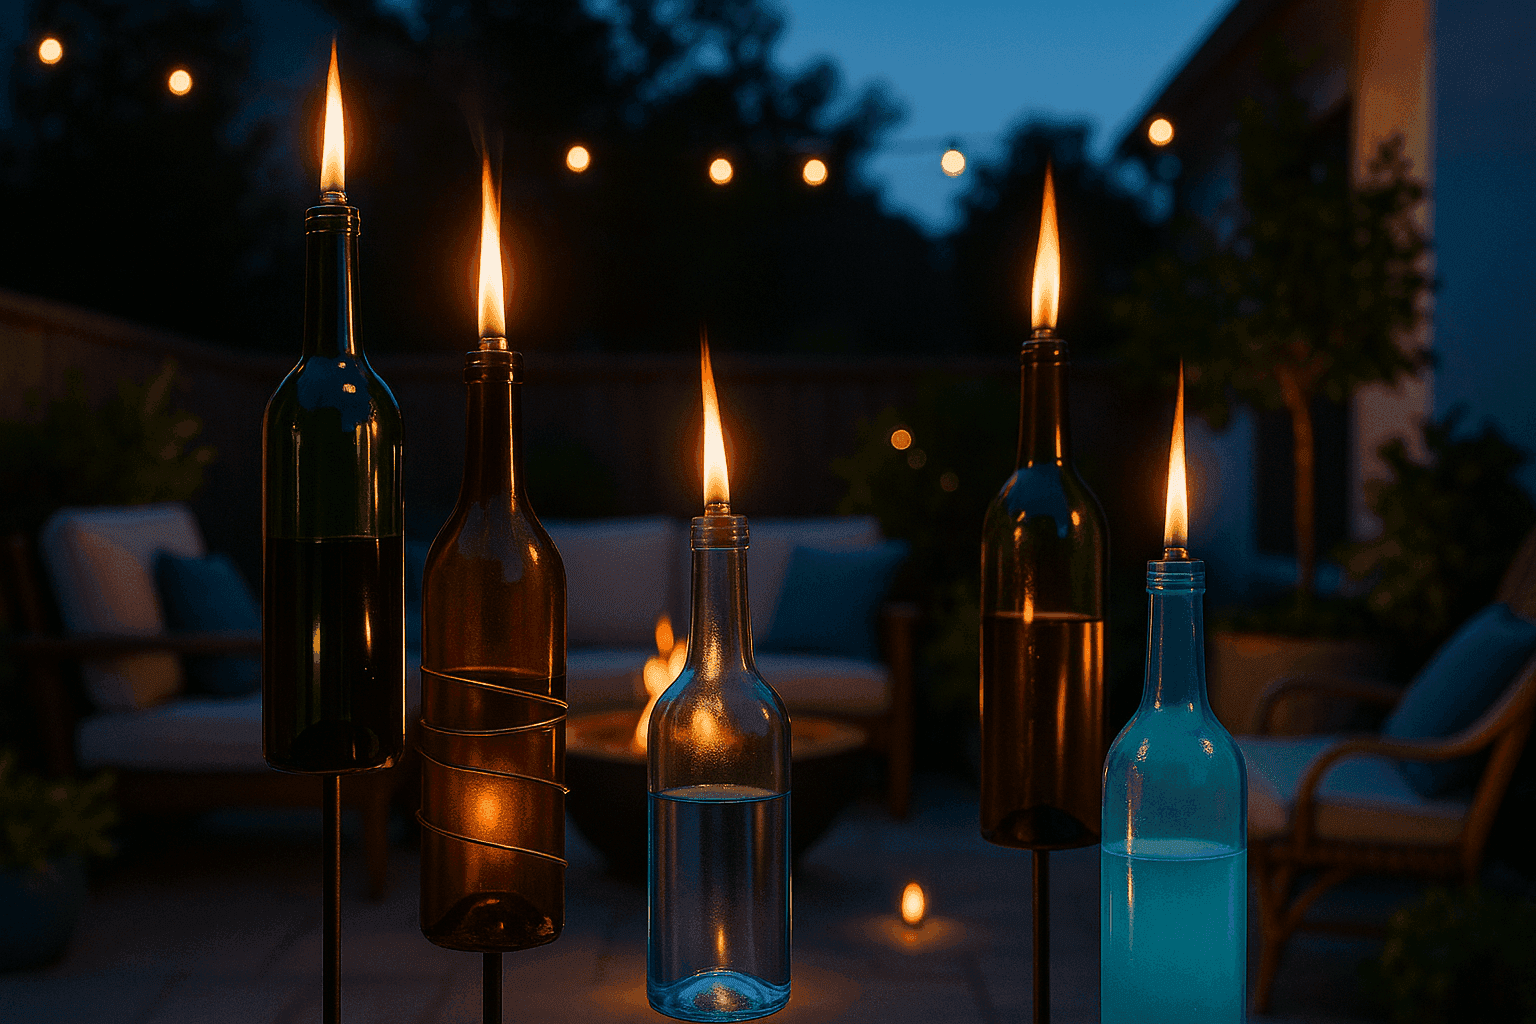
There's something incredibly satisfying about looking at an empty wine bottle and seeing not trash, but the raw materials for your next outdoor lighting masterpiece – it's like having x-ray vision for hidden potential in everyday objects. I discovered this upcycling magic three summers ago when I was hosting a dinner party and realized I had accumulated a small mountain of beautiful wine bottles that seemed too elegant to simply recycle. What started as a desperate attempt to create ambiance on a tight budget turned into one of my most beloved outdoor entertaining traditions, and now guests specifically ask when I'm lighting the "bottle torches" for evening gatherings. The beauty of wine bottle torches lies in their perfect combination of sophistication and practicality; they provide that coveted restaurant-quality ambiance while serving double duty as natural pest deterrents when filled with citronella oil. Whether you're working with bottles from your own dinner table or scouting yard sales and restaurants for interesting shapes and colors, these elegant torches prove that sometimes the most impressive DIY projects come from the most unexpected materials.
Torch Materials
- Wine Bottles: Empty bottles in various colors and shapes, thoroughly cleaned ($0-5 each)
- Torch Fuel: Citronella oil or lamp oil for bug protection and clean burning ($8-20)
- Wicks: Fiberglass or cotton torch wicks sized for bottle openings ($5-15)
- Bottle Cutting Kit: Glass cutter or bottle cutting guide for custom lengths ($10-30)
- Wick Holders: Metal or ceramic wick holders that fit bottle necks ($3-10 each)
- Mounting Options: Rebar stakes, wall brackets, or tabletop holders ($8-25 each)
- Safety Equipment: Gloves, eye protection, and fine sandpaper ($10-20)
- Decorative Elements: Copper wire, glass paint, or etching cream for customization ($5-30)
Construction Steps
- Prepare bottles by removing labels and cleaning thoroughly with degreasing soap
- Cut bottles to desired length if needed, sanding edges smooth for safety
- Install wick holder in bottle neck, ensuring snug fit to prevent leaks
- Insert wick through holder, leaving about 1/4 inch exposed above surface
- Fill bottle with torch fuel, leaving at least 2 inches of space at top
- Allow wick to saturate with fuel for 15-20 minutes before first lighting
- Mount torches securely in chosen holders or stakes at safe distances
- Test lighting and flame adjustment before full deployment
Professional landscape designers create sophisticated torch displays by varying heights and clustering bottles in odd-numbered groups rather than lining them up uniformly. Mix different colored bottles – deep green wine bottles with clear ones, or add amber beer bottles for warm color variation. The key to restaurant-quality ambiance is strategic placement: position torches to define outdoor "rooms" and create intimate lighting zones rather than just perimeter lighting. For the most elegant look, choose bottles with interesting shapes and wrap the necks with copper wire for a refined finish. Also, invest in quality citronella oil rather than cheaper alternatives – it burns cleaner, lasts longer, and provides better bug protection while maintaining that coveted flickering flame that makes outdoor dining feel magical.


