Chair to Hall Tree: The Wall Anchor Isn't Optional
A chair back was built to support weight leaning backward into it, not weight hanging forward from hooks mounted on top — that shift in load direction is exactly why this piece needs to be secured to the wall, not just leaned against it.
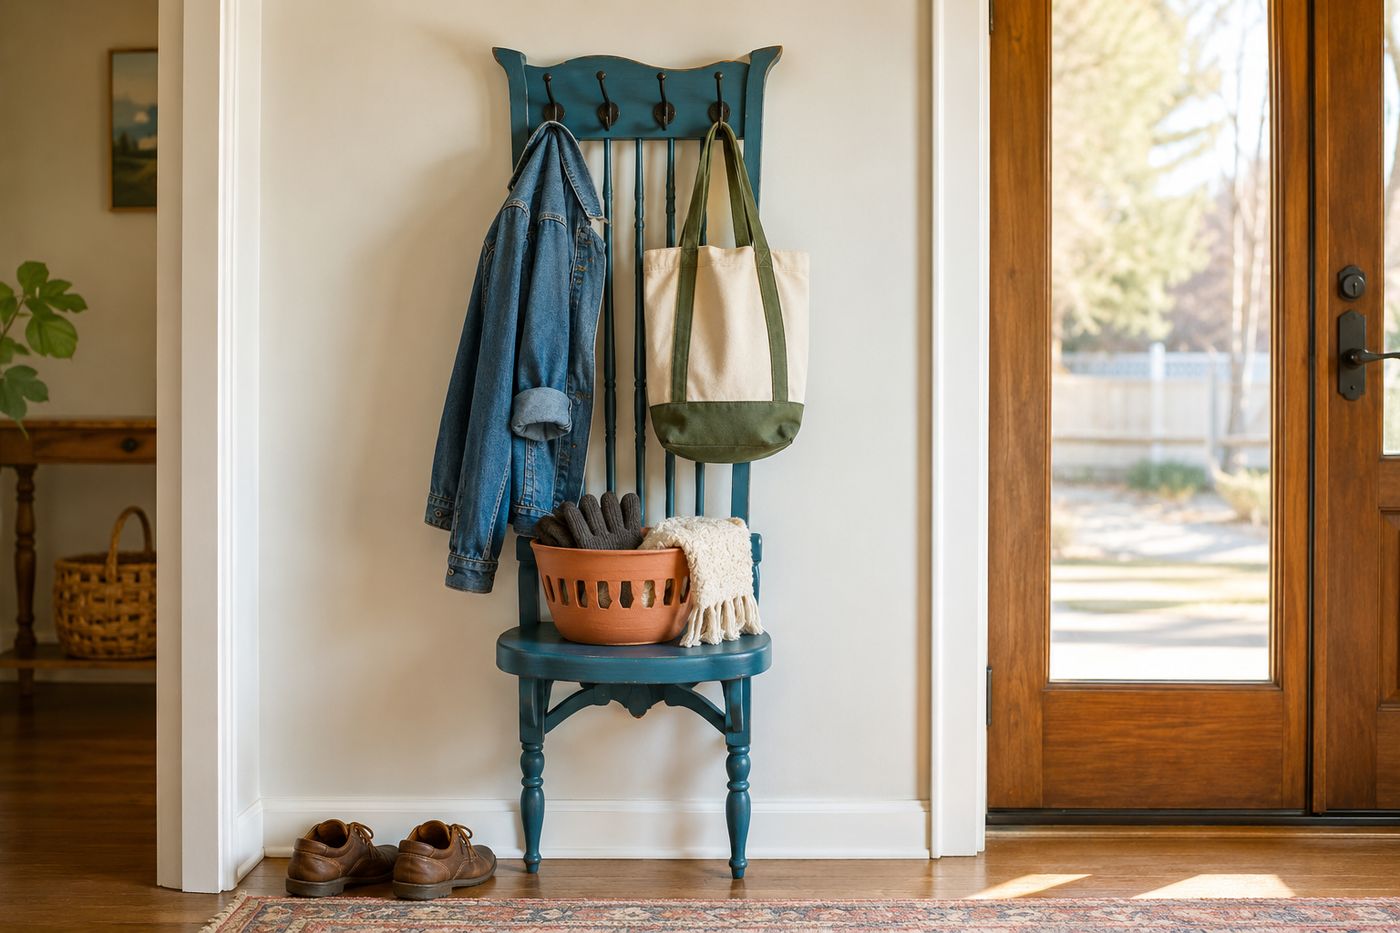
A chair's back is engineered to resist backward pressure from someone leaning into it, which is a completely different force than what happens once coat hooks go on the top rail and a heavy jacket or bag hangs forward off of it — that forward-pulling weight creates a tipping force the original chair design never had to account for, and it gets worse every time someone pulls a jacket off rather than lifting it gently. Leaving the piece freestanding means that tipping force has nothing to resist it except the chair's own base, which was sized for a seated person's weight distributed downward, not a loaded coat rack's weight pulling forward and up high. Securing the top of the chair back to the wall is what actually resolves this mismatch, transferring that forward pull into the wall instead of asking the chair's legs to counteract it alone. That's not a nice-to-have finishing touch, it's the structural fix that matches the piece to its new job. Get that anchoring done, and the rest of the transformation, sanding, paint, hooks, is genuinely simple. A thrifted chair and hardware run about $22, and the build takes roughly two hours.
What You'll Need
- Sturdy wooden chair with a tall back, thrifted or from a yard sale — about $10-15
- Two or three coat hooks — about $6-8
- Paint or stain, in your chosen finish — about $5 if not already on hand
- Sandpaper
- L-brackets or a wall mounting plate, for securing the top of the chair back to the wall
- Stud finder
- Drill/driver
- A small shelf piece or fabric pocket organizer (optional), for keys and sunglasses
- A woven panel or small basket (optional), if the original seat needs replacing
How to Do It
- Clean and sand the chair thoroughly, addressing any rough or splintery spots on the back spindles and seat.
- Paint or stain the chair in your chosen finish, letting it dry and cure fully before attaching any hardware.
- Mount two or three coat hooks evenly spaced along the top rail of the chair back, checking that each is secured firmly into solid wood.
- Attach a small shelf across the back spindles or hang a fabric pocket organizer if you want a spot for keys and sunglasses.
- Replace the seat with a woven or wooden panel, or nestle in a small basket, if the original seat is damaged or you want a dedicated storage spot.
- Position the chair against the wall where it will live, and locate the wall studs behind the top of the chair back.
- Secure the top of the chair back to the wall using L-brackets or a mounting plate anchored into the studs — this step is what actually keeps the piece stable once loaded with jackets and bags, since the forward pull of hanging weight is a different force than the chair's original design accounted for.
- Load the finished hall tree with jackets, bags, and daily essentials, testing that everything sits stable before relying on it for regular use.
Furniture upcyclers who source chairs specifically for this kind of repurposing often prioritize an interesting silhouette, a ladder back, a fan back, a carved crest rail, over the chair's overall condition, since paint and refinishing can fix nearly any surface flaw, but a distinctive shape is what actually gives the finished hall tree personality once it's mounted and can't be added after the fact.