


Create Stunning Layered Harvest Centerpieces With Dollar Store Finds
Layer colorful dried beans and lentils in clear vases for glowing autumn decor under $5
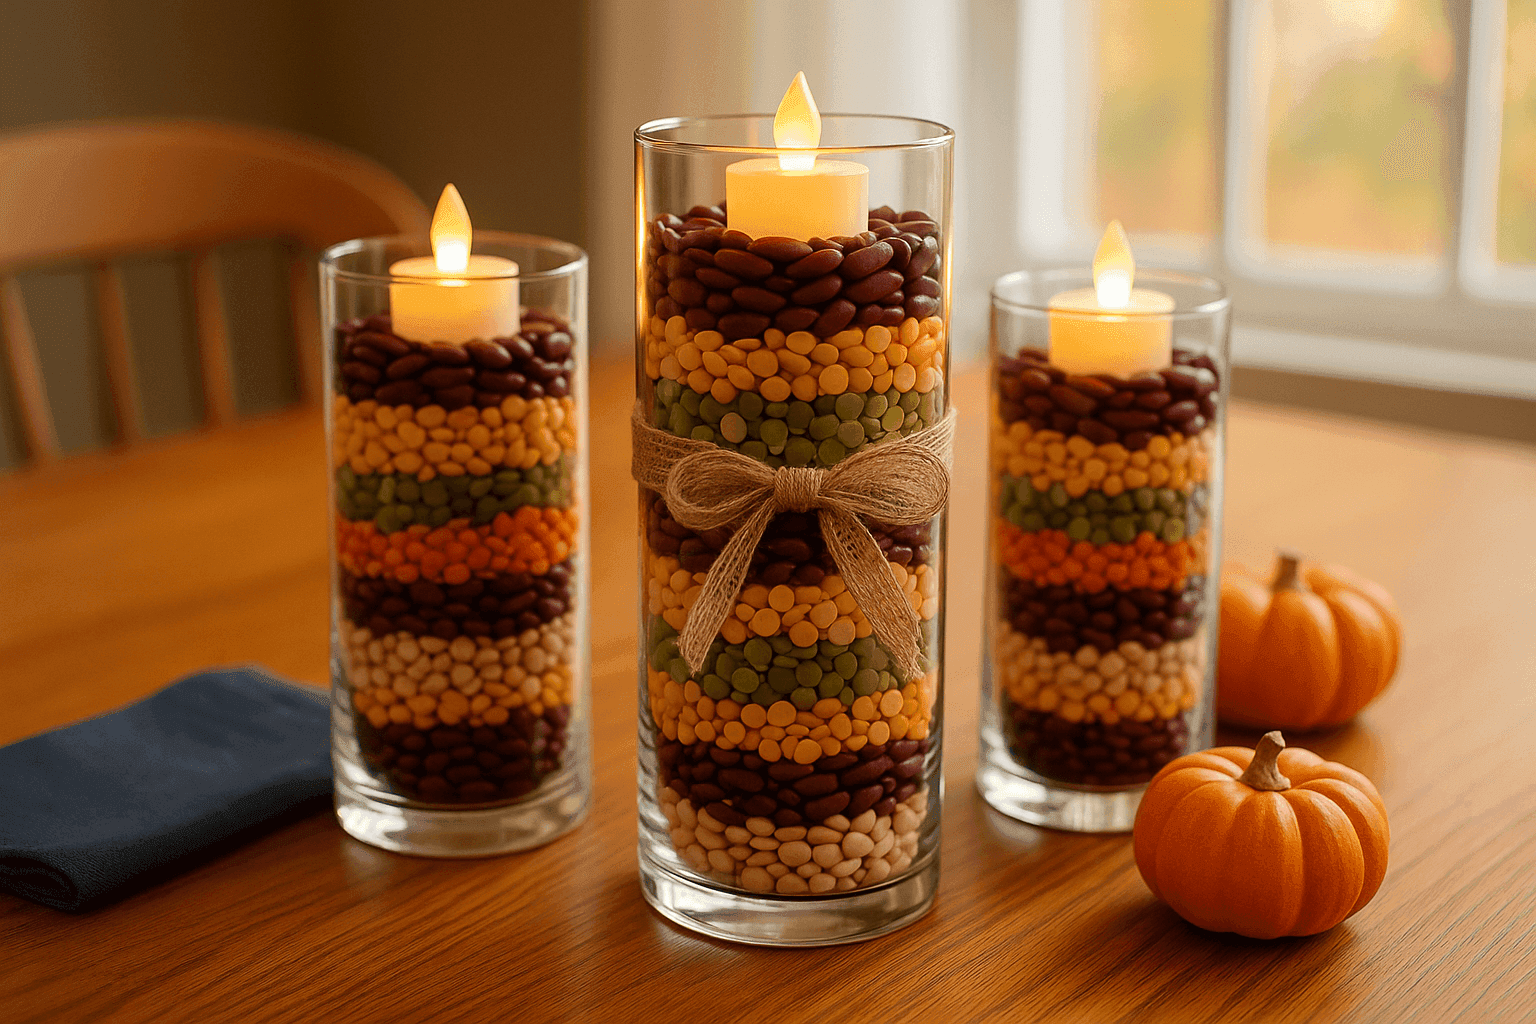
The stunning multicolored beauty of heirloom glass gem corn has captivated everyone's fall Pinterest boards for years, but creating similar harvest displays typically requires either expensive specialty corn or elaborate arrangements—until you discover that humble dried beans, split peas, and lentils from your pantry can recreate that exact gorgeous color palette in clear glass vases for literal pennies. This genius budget craft layers different colored legumes in clear dollar store cylinders or hurricane vases, creating organic striped patterns in burgundy, gold, orange, green, and cream that mimic harvest corn's natural beauty while costing under $5 per centerpiece when you're strategic about purchasing. The battery-operated tea light crowning each vase adds magical glowing ambiance that transforms these simple ingredient displays into sophisticated evening centerpieces worthy of Thanksgiving tables, holiday gatherings, or everyday fall decor that catches light beautifully during the day and creates warm illumination after dark. What makes this project so satisfying is the instant gratification combined with zero artistic skill requirement—you're literally just pouring dried goods into glass containers in layers, yet the result looks intentionally designed and surprisingly elegant rather than obviously crafted from grocery store staples. The natural texture and organic color variation in beans creates visual interest impossible to achieve with artificial materials, and the weight of filled vases provides substantial heft that makes them feel quality and permanent rather than flimsy or temporary like many budget decorations tend to appear.
Centerpiece Supplies
- Clear Glass Containers:
- Dollar store cylinder vases (various heights, $1-3 each)
- Hurricane vases or glass candleholders ($1-3 each)
- Clear glass jars or apothecary containers ($1-2 each)
- Must be clear glass to showcase colorful layers
- Dried Legumes (Choose 4-6 Colors):
- Red kidney beans for burgundy layer ($1-2 per bag)
- Yellow split peas for golden yellow ($1-2 per bag)
- Orange lentils for bright orange ($1-2 per bag)
- Green split peas for olive green ($1-2 per bag)
- Navy beans or white northern beans for cream ($1-2 per bag)
- Black beans for dark contrast (optional, $1-2 per bag)
- Lighting Elements:
- Battery-operated LED tea lights (pack of 6-12, $5-8)
- Or flameless taper candles for taller vases ($8-12)
- Choose warm white for cozy glow
- Optional Enhancements:
- Burlap ribbon or twine for wrapping vase necks ($2-3)
- Small fall leaves or acorns for topping ($2-4)
- Cinnamon sticks to tuck between layers ($3-5)
- Raffia bows for rustic finishing touch ($2-3)
- Tools:
- Funnel or paper cone for precise pouring
- Small cups for pre-measuring legume amounts
- Pencil or dowel for leveling layers
Creating Layered Centerpieces
- Plan Your Color Order: Before starting, arrange your dried legumes in the color sequence you want, typically placing darkest colors at the bottom and lighter colors toward the top to create natural gradient that mimics harvest corn's organic pattern—sketch a quick diagram if working with multiple vases to maintain consistent design across your centerpiece collection.
- Clean Vases Thoroughly: Wash and dry all glass containers completely inside and out, polishing exteriors with glass cleaner to remove fingerprints and streaks—crystal-clear glass is essential for showcasing your colorful layers properly, and any smudges or water spots detract significantly from the final polished appearance you're trying to achieve.
- Pour First Layer: Using a funnel or carefully pouring directly, add your first legume color to create a 1-2 inch layer at the vase bottom, gently tapping the vase on your work surface to settle beans and eliminate air pockets—this base layer establishes your pattern and must be level since subsequent layers build upon it creating visible problems if foundation is uneven.
- Level Each Layer: After pouring each color, use a pencil or thin dowel to gently push beans against the glass perimeter creating a level surface before adding the next color—this prevents the sloped effect where beans naturally settle at angles and ensures each color band appears crisp and intentional rather than haphazardly mixed at boundaries.
- Add Subsequent Colors: Pour each additional legume layer slowly and carefully to avoid disturbing the layer below, building upward until your vase is filled to within 2-3 inches of the rim—layer thicknesses can vary for visual interest with some bands wider than others creating organic rhythm rather than rigid uniform stripes that look overly structured and unnatural.
- Create Pattern Variations: Experiment with different approaches across multiple vases—some with thin equal stripes, others with thick graduated bands, or even random mixed layers at the bottom transitioning to organized stripes at top—this variety creates more interesting grouped displays than identical vases that look mass-produced rather than artfully arranged.
- Add Decorative Elements: Tuck dried corn husks, cinnamon sticks, or small branches vertically between the glass and the legumes before adding final layers, which creates additional visual texture and reinforces the harvest theme—these natural elements become visible design features through clear glass adding dimension beyond just colored bean stripes.
- Top With Lighting: Place battery-operated LED tea lights on top of your filled vases, adjusting final legume layer height if needed so tea light sits stable and level—turn lights on to check the glow effect, which illuminates the top legume layer beautifully while casting warm ambient light perfect for evening entertaining or daily autumn ambiance in your home.
Event designers who create high-end centerpieces for weddings and galas use the "rule of three heights" to create dynamic table displays that have professional visual flow rather than flat monotonous repetition. Purchase or gather three different vase heights—perhaps a 6-inch cylinder, 10-inch cylinder, and 14-inch hurricane vase—then fill all three with identical or coordinating legume patterns and group them together on your table or mantel with the tallest in back, medium in middle, and shortest in front. This tiered arrangement creates depth and movement that guides the eye naturally through your display rather than presenting a flat line of identical elements. The cost-saving secret that lets you create multiple centerpieces without buying pounds of every legume color is the strategic layering technique where you use expensive or harder-to-find colors (like orange lentils) only in the center visible band, then fill the hidden bottom and top layers with inexpensive filler like white beans or split peas that cost pennies. Since only the middle portion of tall vases is truly visible once placed on tables surrounded by dishes and serving pieces, you're maximizing visual impact while minimizing actual material cost. For displays that need to last beyond one season, store your filled vases carefully in a cool dry place and they'll remain beautiful for years—dried beans don't spoil, fade, or deteriorate, making these essentially permanent decorations you can bring out every fall. Just protect from moisture which causes beans to swell and potentially crack your glass containers. Consider labeling the bottom of each vase with its legume contents so you can easily refill or repair layers if needed without forgetting your original color pattern that made that particular vase so successful and beautiful in your overall autumn decorating scheme.


