


Fix a Dripping Outdoor Faucet for $2–$5
A worn washer is almost always the culprit — and replacing it takes 30 minutes flat
That slow drip from your outdoor faucet feels like a minor annoyance right up until you realize it's been running all season and added real money to your water bill without watering a single plant. The good news is that the overwhelming majority of outdoor faucet drips come down to one tiny culprit: a worn rubber washer at the base of the valve stem that costs about $1 to replace and takes 30 minutes to swap out start to finish. This is genuinely one of the most approachable plumbing repairs a homeowner can do — no soldering, no special skills, no plumber required — and fixing it now before spring watering season means your outdoor faucet is fully reliable the moment you actually need it. Bring the old washer to the hardware store, match the size, spend $2–5 on parts, and that drip is done. It's the kind of repair that makes you feel like a capable, competent homeowner, because it turns out you absolutely are.
What You'll Need
- Replacement Parts (~$2–5 total)
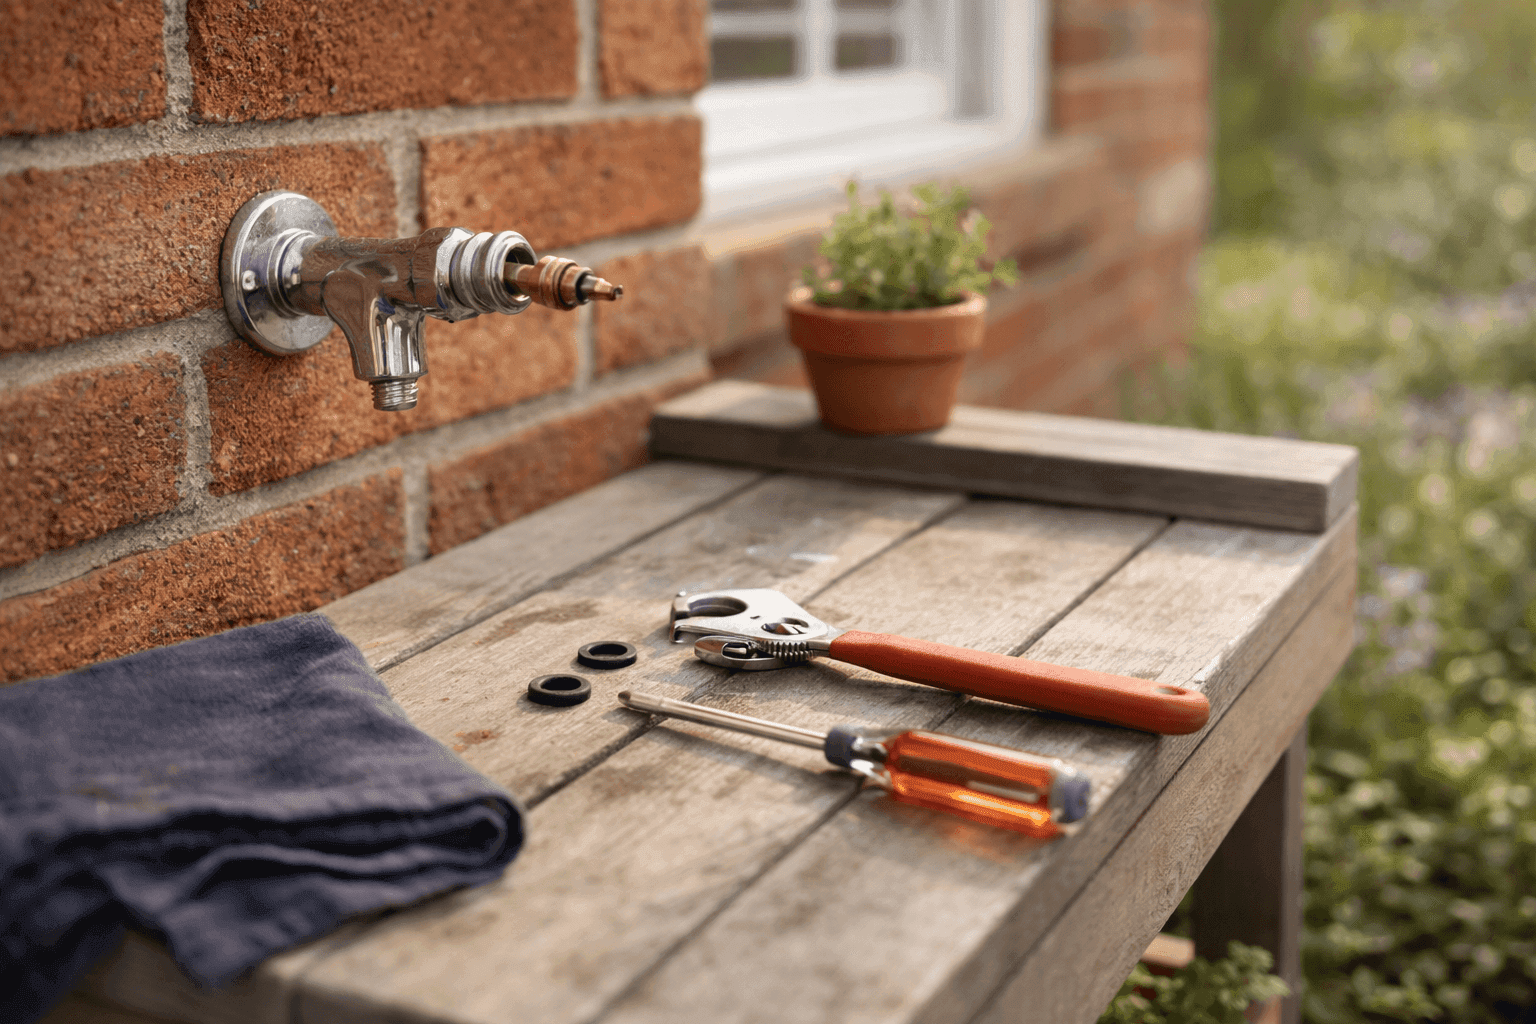
- Replacement rubber washer — bring your old one to the hardware store for an exact size match; most standard outdoor faucets use a 3/4-inch flat washer
- O-ring to fit your valve stem — inspect the old one during disassembly and replace if cracked, flattened, or visibly worn
- Plumber's grease — a small dab on the new washer and O-ring before reassembly extends their lifespan significantly (~$3–4 for a small tube that lasts for years)
- Packing material or packing washer — only needed for frost-free faucets with a slow drip from around the stem cap rather than the spout
- Tools
- Adjustable wrench or channel-lock pliers for removing the packing nut
- Flathead screwdriver for prying out the old washer and removing the handle screw
- Phillips screwdriver for the handle screw on most faucets
- Old towel or rag for catching drips during disassembly
- Bucket — optional but helpful for catching the small amount of water remaining in the line
- Total Cost
- $2–5 in parts — essentially free if you already own plumber's grease and just need the washer
How to Fix It
- Shut off the water supply to the outdoor faucet — this valve is almost always located inside the house in the basement, crawl space, or utility room on the pipe that runs to the exterior wall. Turn it fully clockwise until it stops, then open the outdoor faucet to drain whatever water remains in the line before you start disassembling anything.
- Remove the handle by locating the screw at its center — it may be hidden under a decorative cap that pops off with a flathead screwdriver. Back the screw out completely and pull the handle straight off the stem. Set the screw somewhere you won't lose it.
- Unscrew the packing nut — the large hexagonal nut directly behind where the handle sat — using your adjustable wrench. Turn counter-clockwise. This nut holds the entire valve stem assembly in place, and loosening it is the key step that allows the stem to be removed.
- Pull out the valve stem by turning it counter-clockwise until it threads free of the faucet body. It may take several full rotations — keep turning until the stem comes out completely. Have your rag ready, as a small amount of residual water will follow it out.
- Inspect the stem bottom where you'll find the rubber washer held in place by a brass screw. Pry out the old washer with a flathead screwdriver or simply back out the brass screw to release it. Examine the O-ring circling the mid-section of the stem at the same time — if it looks cracked, compressed, or shiny from wear, replace it now while everything is apart.
- Match and replace the washer by taking the old one to your hardware store for an exact size match — diameter and thickness both matter here. A washer that's even slightly too small won't seal properly and the drip will return. Apply a thin smear of plumber's grease to the new washer and O-ring before installation to help them seat correctly and last longer.
- Reassemble in reverse — thread the stem back into the faucet body clockwise until it seats, tighten the packing nut snugly with the wrench (firm but not overtightened), and reattach the handle. For frost-free faucets dripping from around the stem cap rather than the spout, tighten the packing nut first before disassembling — sometimes that alone stops the leak without any parts replacement needed.
- Test the repair by turning the indoor shutoff valve back on slowly, then opening and closing the outdoor faucet several times. Check for drips both at the spout and around the packing nut while the water runs. A successful repair is completely dry at both points within a few seconds of closing the faucet handle.
Plumbers who service outdoor faucets regularly almost always replace both the washer and the O-ring at the same time, even if only one appears visibly worn — the two components age at nearly identical rates, and pulling the stem a second time in six months because the O-ring failed after you just replaced the washer is exactly the kind of avoidable frustration that makes people swear off DIY repairs. While you have the stem out, also take 30 seconds to check the brass screw that holds the washer in place: a corroded or stripped screw is worth replacing with a fresh one now, since a failed screw mid-season means the washer can't stay seated and the drip returns regardless of how new the rubber is.


