


Framed Nature: DIY Botanical Wall Hangings
Create stunning pressed flower art pieces for a touch of preserved spring beauty
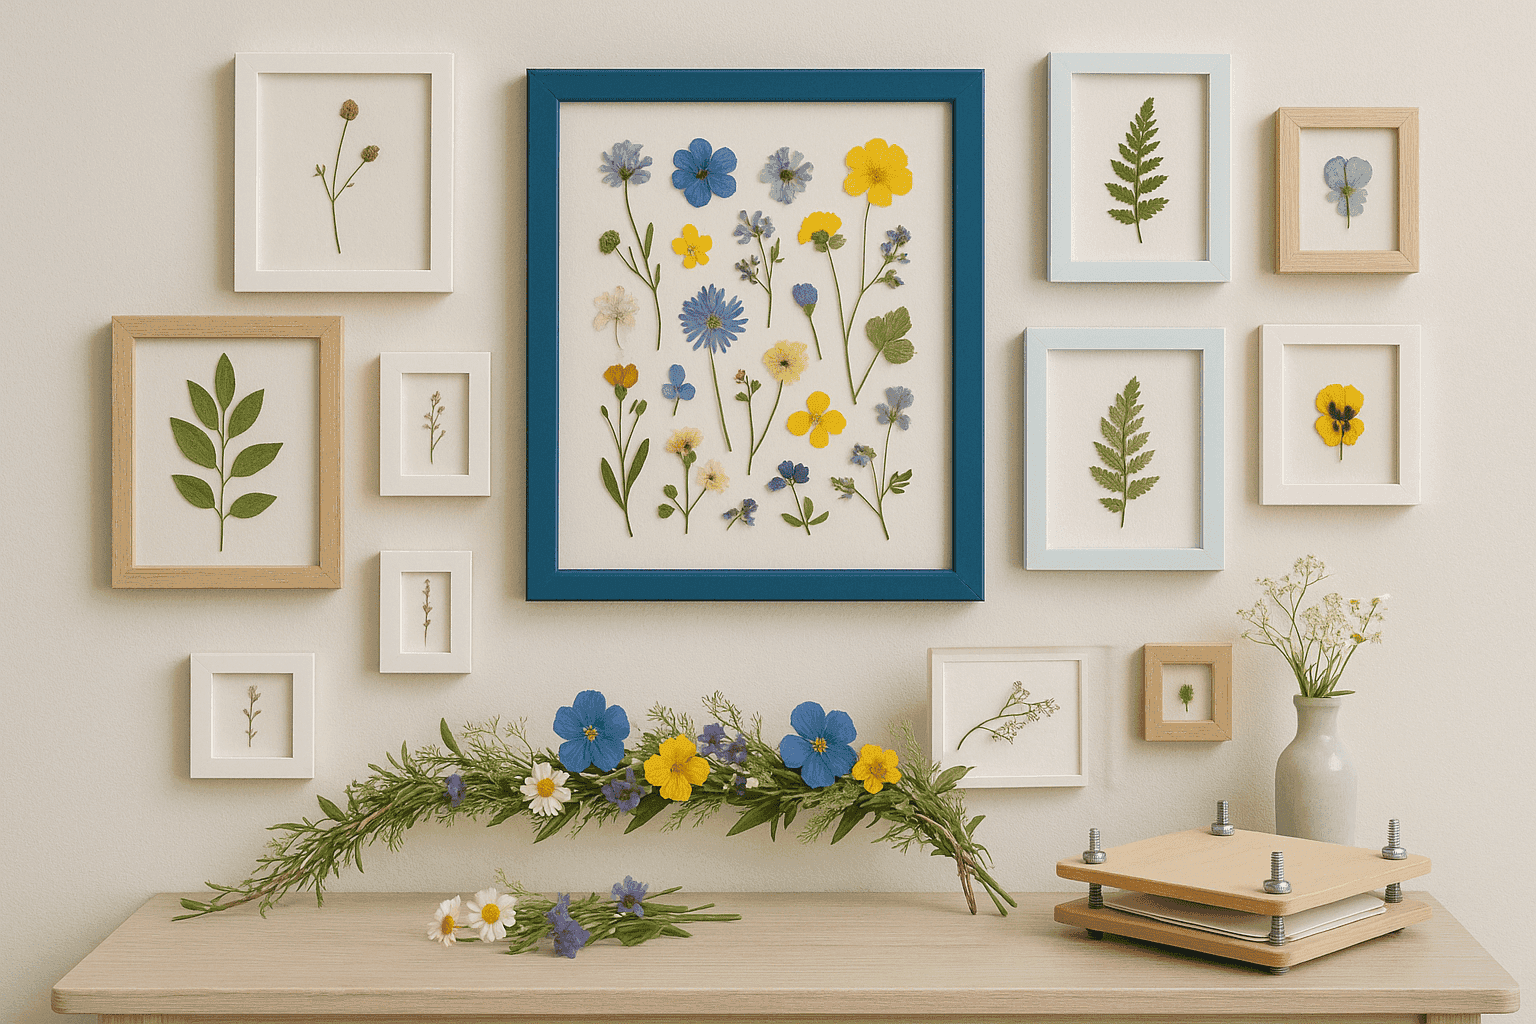
Botanical wall art brings the delicate beauty of nature indoors while creating sophisticated, timeless decor. By pressing and framing flowers, leaves, and other plant materials, you can preserve spring's ephemeral beauty year-round. These natural art pieces not only add organic texture and color to your walls but also allow you to display meaningful plants from special occasions or favorite garden specimens. With a few simple techniques and materials, you can create professional-looking botanical displays that rival expensive gallery pieces while providing a personal connection to nature.
What You'll Need
| For Pressing Plants: |
| • Fresh flowers and foliage |
| • Heavy books or flower press |
| • Absorbent paper (blotting paper or coffee filters) |
| • Tweezers for arranging delicate specimens |
| Framing Materials: |
| • Floating glass frames (double glass) |
| • Standard picture frames with glass |
| • White or colored mat boards |
| • Acid-free mounting paper or cardstock |
| • Acid-free glue or adhesive dots |
| • Frame hanging hardware |
| Optional Materials: |
| • Fine-tipped pen for labeling specimens |
| • Decorative papers for backgrounds |
| • Microglitter or metallic accents |
| • UV-protective glass or spray |
| • Small paintbrush for applying glue |
| • Ruler and pencil for layout planning |
How To Do It
- Collect and prepare your botanicals:
- Gather flowers and leaves at their peak, ideally in the late morning after dew has dried
- Choose flat specimens or those that will press well (avoid very thick or watery plants)
- Consider color—some flowers retain color better than others when dried
- Great spring choices: pansies, violets, larkspur, Queen Anne's lace, ferns, and small leaves
- Clean specimens gently to remove any dirt or insects
- Press your botanical specimens:
- Arrange flowers face down on absorbent paper, carefully opening petals
- Place another sheet of absorbent paper on top
- Insert between pages of a heavy book or in a flower press
- Add more books on top if using the book method
- Leave undisturbed for 2-3 weeks until completely dry and flat
- Change the absorbent paper after 3-4 days to prevent mold
- Plan your compositions:
- Gather your pressed specimens and sort by type, size, and color
- Sketch layout ideas on paper the same size as your frame
- Try different arrangements before committing to adhesive
- Consider these composition styles:
- Botanical study: Single specimen centered with space around it
- Collection: Multiple related specimens arranged in a grid
- Wreath or circular arrangement
- Layered bouquet with various textures and colors
- Create a floating glass frame display:
- Open the floating frame and clean both glass pieces thoroughly
- Use tweezers to position specimens on one glass pane
- For delicate pieces, apply tiny dots of acid-free glue
- Carefully place the second glass pane on top
- Secure the frame according to manufacturer's instructions
- This method creates a beautiful transparent effect
- Create a matted frame display:
- Choose acid-free backing paper in white or complementary color
- Arrange specimens on the backing paper
- Once satisfied, carefully apply small dots of acid-free glue
- Press gently with a clean cloth or paper towel
- Allow to dry completely before framing
- Add mat board if desired for a more finished look
- Assemble frame according to manufacturer's instructions
- Add professional details:
- Consider adding botanical identification labels in fine pen
- Include collection date and location for a scientific look
- Use metallic ink to highlight certain elements
- For wedding flowers, add wedding date or small quote
- Apply UV-protective spray or use UV-filtering glass to prevent fading
- Create a gallery wall arrangement:
- Make multiple botanical frames in complementary styles
- Vary frame sizes but keep frame styles consistent
- Arrange frames on the floor before hanging to find ideal layout
- Consider a mix of single specimens and grouped arrangements
- Maintain consistent spacing between frames (2-3 inches works well)
- Hang at eye level for optimal viewing
- Care for your botanical art:
- Hang away from direct sunlight to prevent fading
- Avoid areas with high humidity like bathrooms
- Dust frames gently with a microfiber cloth
- Check periodically for any signs of moisture inside frames
- Rotate seasonal displays to keep your decor fresh
Professional botanical artists use several techniques to elevate their framed specimens beyond basic pressed flowers. First, consider the "narrative clustering" approach—grouping plants that tell a story together, such as herbs from your garden, wildflowers from a special hike, or flowers that bloom in a particular month. For preserving the most vibrant colors, professionals often use silica gel drying for certain flowers before pressing, which maintains much of the original color intensity. When mounting delicate specimens, museum conservators use tiny strips of acid-free paper formed into loops (rather than glue directly on specimens) to create archival-quality "cradles" that hold botanicals in place without damaging them. For the most sophisticated presentation, consider what designers call "contextual negative space"—using backgrounds that enhance rather than compete with the specimens, such as handmade papers with subtle natural fibers or watercolor washes in complementary hues.


