


Makeover Plastic Containers into Planter Boxes: Trash to Treasure
Transform everyday plastic waste into charming planters that look anything but disposable
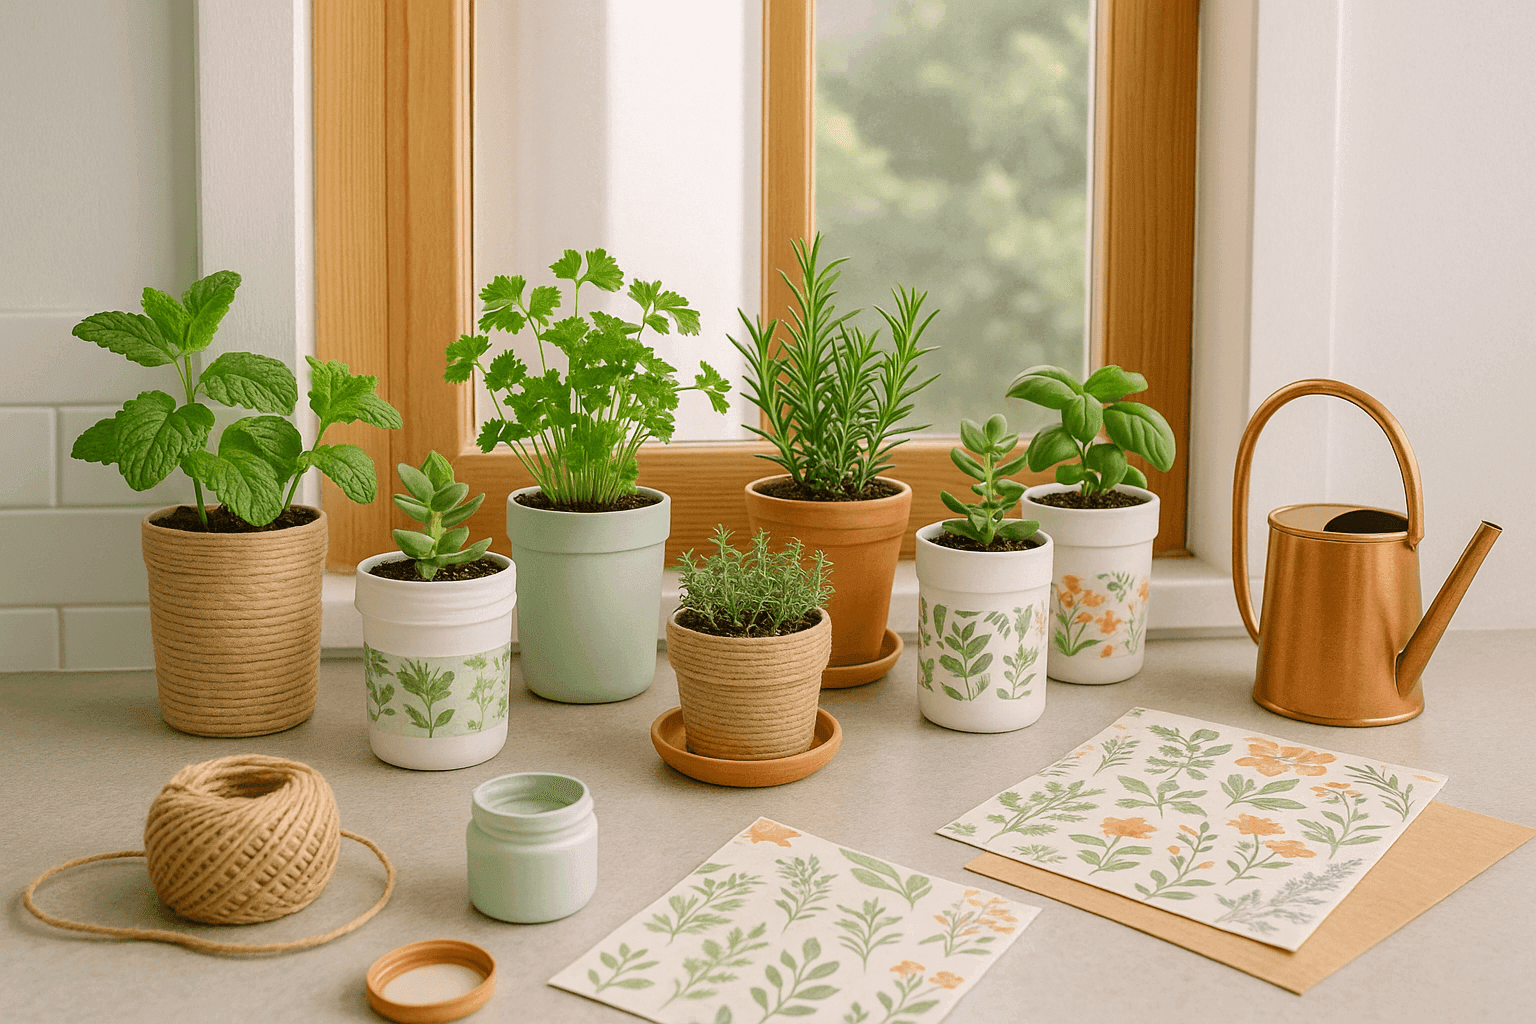
Every time you finish a yogurt container or toss a takeout box, you're throwing away the perfect planter waiting to happen – free, the right size for herbs and small plants, and already equipped with the depth needed for healthy root growth. Transforming these humble plastic containers into charming planters costs virtually nothing while keeping useful materials out of landfills and giving you endless containers for your growing plant collection. Whether you wrap them with natural twine for rustic appeal, paint them with chalk paint for farmhouse charm, or decoupage them with decorative paper for colorful personality, these makeovers disguise their plastic origins so well that guests will never guess they started life holding last Tuesday's lunch. The beauty of this project is that you can create an entire coordinated planter collection without spending a dime on containers, putting your money toward quality soil and plants instead.
Makeover Materials
- Base Containers: Clean yogurt containers, takeout boxes, plastic tubs in various sizes
- Twine Wrapping: Natural jute twine, hot glue gun, scissors for cutting
- Paint Option: Chalk paint in desired colors, foam brushes, clear sealer for protection
- Decoupage Materials: Decorative scrapbook paper, Mod Podge or decoupage medium, foam brush for application
- Drainage Prep: Drill or heated nail for creating drainage holes, small stones or pebbles
- Finishing Touches: Sandpaper for rough edges, painter's tape for clean lines, embellishments like buttons or labels
Transformation Process
- Clean containers thoroughly, removing all labels and adhesive residue with rubbing alcohol
- Create drainage holes in the bottom using a drill or heated nail to prevent waterlogged soil
- Choose your decoration method based on desired style – twine for rustic, paint for farmhouse, paper for colorful
- Wrap with twine by applying hot glue in sections and pressing twine firmly, working from bottom to top
- Paint with chalk paint in thin coats, allowing complete drying between layers for smooth coverage
- Decoupage by cutting paper to size, brushing medium on container, smoothing paper, then sealing with topcoat
- Add drainage layer of small stones before filling with potting soil for proper water flow
- Plant herbs, succulents, or small flowers, creating a beautiful container garden from recycled materials
Professional upcyclers create cohesive planter collections by choosing one decorating method and using it consistently with coordinating colors – three twine-wrapped containers look intentional, while mixing random techniques looks chaotic. For outdoor use, seal painted or decoupaged containers with several coats of waterproof sealer to protect your work from weather damage. The secret to making plastic containers look expensive is paying attention to the rim – wrap it completely with twine, paint it a contrasting color, or fold decorative paper over the edge for a finished look that hides the container's humble origins.


