Pumpkin Display Stand: Weight First, Then the Angle
A back tier that rises higher than the front creates real leverage under the weight of full-size pumpkins — the largest, heaviest tier needs to sit at the base, or the whole stand tips forward the moment it's loaded.
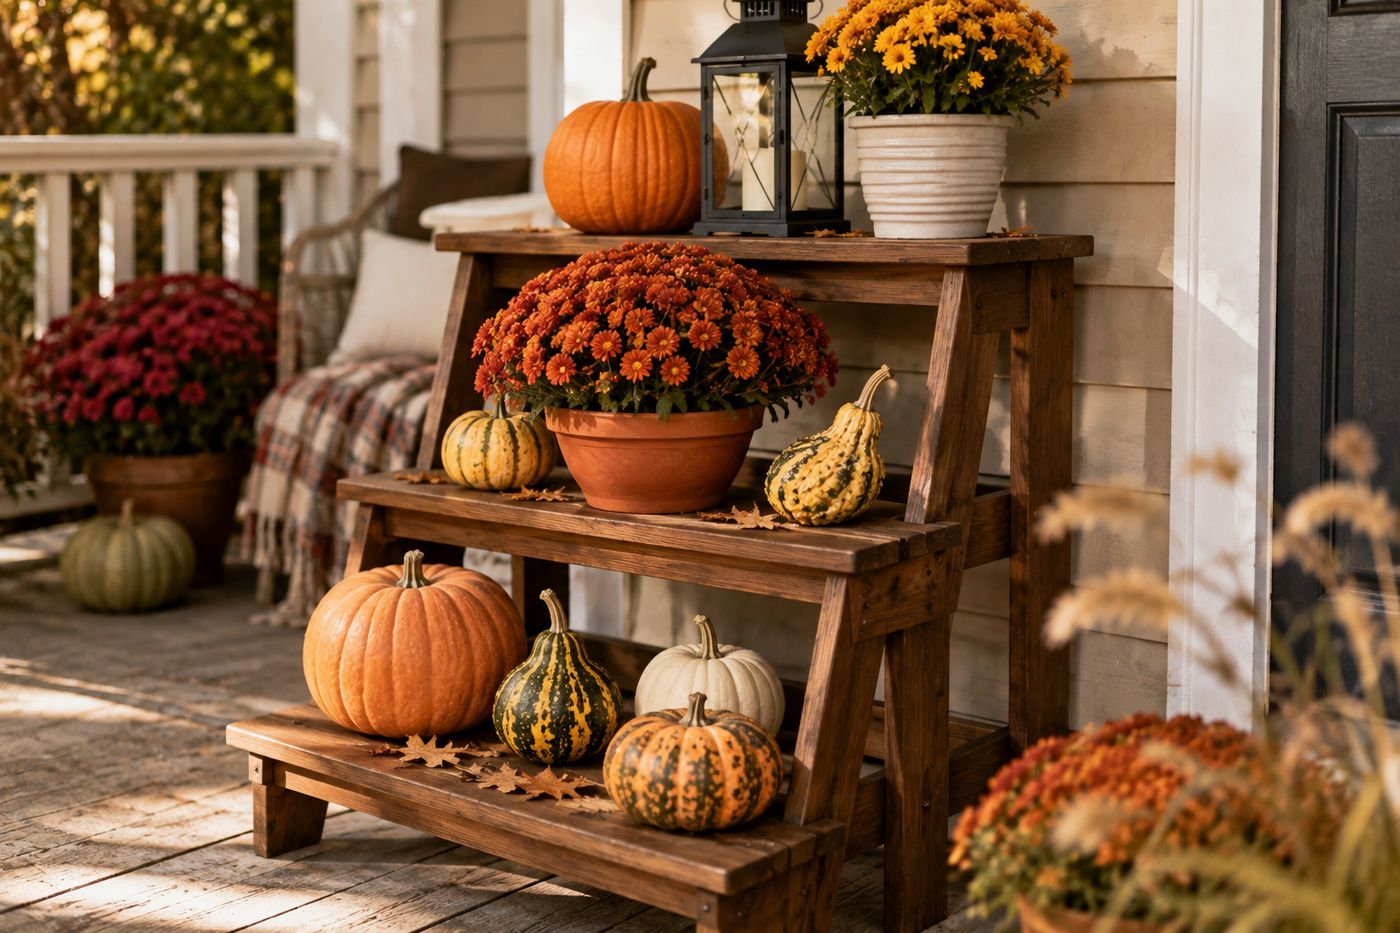
A stepped tier stand puts weight progressively higher and further back with each level, and full-size pumpkins are genuinely heavy — a stand that isn't sized correctly can tip forward under that load, especially once the upper tiers are loaded with anything substantial. The fix is straightforward but easy to get backward: the bottom, front tier needs to be your widest and most stable platform, carrying the heaviest pumpkins, while progressively smaller and lighter items, mums, gourds, small lanterns, move upward and back. Getting that weight distribution wrong, putting your biggest pumpkin on the smallest top tier because it looks dramatic, is exactly what creates a genuine tipping hazard rather than just an awkward-looking display. The stepped side panel angle matters too, since a shallower rise keeps the whole structure's center of gravity lower and more stable than a steep one, even before any pumpkins go on. Solid joinery with glue and exterior screws matters, but it's this weight-distribution decision that determines whether the finished piece is safe to load heavily. Get that right, and the build itself costs about $25 in lumber and takes roughly two and a half hours.
What You'll Need
- 2x10 or 2x12 lumber, for the stair-step side panels — about $12
- 1x8 or 1x10 lumber, for the horizontal shelf boards — about $8
- Exterior wood glue
- Exterior wood screws
- Exterior stain, paint, or weatherproof sealer — about $5
- Jigsaw, for cutting the stair-step profile
- Sandpaper
- Drill/driver, tape measure, square
How to Build It
- Decide on 2-3 tiers, planning a shallow, gradual step rise rather than a steep one, since a lower center of gravity keeps the whole stand more stable once loaded.
- Cut two side panels from 2x10 or 2x12 lumber in a stair-step profile using a jigsaw, keeping both panels identical.
- Cut your horizontal shelf boards to width, planning the bottom tier as the widest and sturdiest platform, since it needs to support your heaviest pumpkins.
- Attach each shelf board across the step levels between the two side panels, securing every joint with wood glue and exterior screws.
- Check the assembled structure for square and stability before moving on, confirming it sits flat and doesn't rock.
- Sand the entire piece smooth, rounding sharp edges and corners.
- Finish with exterior stain, paint, or weatherproof sealer, since this piece will likely live outdoors through fall weather.
- Arrange your display with the heaviest, largest pumpkins on the bottom tier and progressively lighter items, gourds, mums, small lanterns, moving upward and toward the back.
Seasonal display designers who style porch arrangements for clients often place the single largest pumpkin slightly off-center on the bottom tier rather than dead center, since a perfectly symmetrical arrangement can read as stiff and staged, while an asymmetrical anchor piece with smaller items balanced around it looks more like an abundant, natural harvest gathering.