Style a Cozy Fall Entryway Vignette in 1 Hour for $35
The difference between an entryway that looks staged and one that feels lived-in comes down to varying height and texture, not just swapping summer decor for pumpkins.
![[#~image_alt_1~#]](/_next/image?url=https%3A%2F%2Fd3klpa3rfwubzz.cloudfront.net%2Fmedia%2FAPI%20Uploads%2FDIY%2F5255846fc980a2ed6a48b2517e6393fb_5ef66afd1c.jpg&w=1920&q=75)
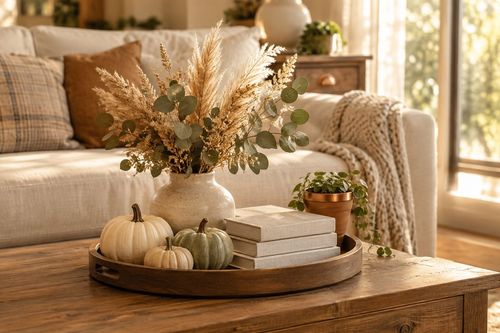
Every fall, people dump a pumpkin and a candle on their entry table and wonder why it still looks flat. The real fix is a design principle stylists rely on constantly: varying height, texture, and light source so the eye has somewhere to travel instead of landing on one flat plane. A vignette with everything sitting at the same height reads as clutter, while one built with a tall anchor, a mid-height layer, and a low textural element reads as intentional, even with cheap materials. This whole refresh takes about an hour and runs around $35 if you're starting from scratch, less if you're raiding your own closets. The mechanism matters more than the objects themselves — you can do this with things you already own once you understand the height-and-texture logic.
What You'll Need
- Materials (~$35 total):
- 1 tall stems bundle of dried wheat, pampas grass, or eucalyptus (~$10) — serves as your tallest anchor element
- 1 pillar candle in an amber or terracotta glass holder (~$8) — adds warm light and a mid-height layer
- 2-3 small pumpkins or gourds, natural or painted (~$9) — low-height textural grounding
- 1 woven or jute table runner or tray (~$6) — unifies the vignette and protects the surface
- Optional: a small stack of 2-3 books or a low wooden box for extra height variation (free, from around the house)
- Tools:
- Scissors or floral shears for trimming stems
- Measuring tape (optional, for centering on the table)
How to Do It
- Clear the entryway surface completely before you start — you can't judge height and spacing accurately if you're building around leftover mail and keys.
- Lay the woven runner or tray down first so it anchors the whole grouping visually and keeps candle wax or gourd residue off the furniture finish.
- Place your tallest element — the dried stem bundle — toward the back third of the surface, off-center rather than dead-middle, since asymmetry is what makes a vignette look curated instead of accidental.
- Position the candle at a mid-height point in front of and slightly to the side of the tall stems, creating a visible step down in height that guides the eye through the grouping.
- Stack a couple of books or a low box near the candle if you have one, then set the candle or a small pumpkin on top — this added tier is what separates a two-level vignette from a genuinely layered one.
- Scatter the small pumpkins and gourds at varying distances in the front, turning their stems at different angles so they don't look mass-produced or lined up.
- Check the negative space by stepping back several feet — if one side feels heavier, shift an object rather than adding more, since overcrowding is the fastest way to undo the height-and-texture effect.
- Light the candle in the evening and observe how the warm glow interacts with the dried textures — this is your final confirmation that the layering actually reads well under real lighting conditions, not just daylight.
Interior stylists staging model homes swear by the 'rule of odd numbers and varied heights' — grouping objects in threes or fives at three distinct height tiers rather than two, since the human eye reads three-tier compositions as more intentional and finished than two-tier ones. Try adding one more low element than you think you need, like a single small gourd tucked slightly behind the runner's edge, to push the vignette into that third tier without cluttering the surface.