DIY Projects

Recent Content

Space Savers: Make Your Own Seed Tape for $5

Space Savers: Make Your Own Seed Tape for $5

Flour paste + toilet paper + tiny seeds = perfectly spaced rows with zero thinning. Make a full season of seed tape in 30 minutes for under $5.

Rise Up: Build a Garden Trellis Arch This Weekend

Rise Up: Build a Garden Trellis Arch This Weekend

Stop growing flat when you could grow up. A handbuilt trellis arch doubles your garden space, supports serious vine crops, and looks stunning all season.

Stand Tall: Build a Wooden Plant Stand for $10

Stand Tall: Build a Wooden Plant Stand for $10

Four legs + a few cross braces + 90 minutes = a minimalist plant stand that looks $60 and costs $10 to build. Make three at different heights and go.

Steeped in Green: Succulents in a Vintage Teacup

Steeped in Green: Succulents in a Vintage Teacup

A thrifted teacup, a handful of gravel, and one tiny succulent — the desk décor that looks precious, costs under $15, and barely needs watering.

Counter Culture: Turn a Dresser into a Kitchen Island

Counter Culture: Turn a Dresser into a Kitchen Island

A thrifted dresser + butcher block top + locking casters = a custom kitchen island for $60–$100. Skip the $400 store version and build character instead.

Upcycle Old Books into Hidden Storage Boxes: Literary Secrets

Transform outdated hardcovers into clever hiding spots that blend seamlessly on shelves

Hollowed hardcover book with hidden compartment revealing secret storage space, surrounded by craft tools on wooden work surface
DIY PROJECTS

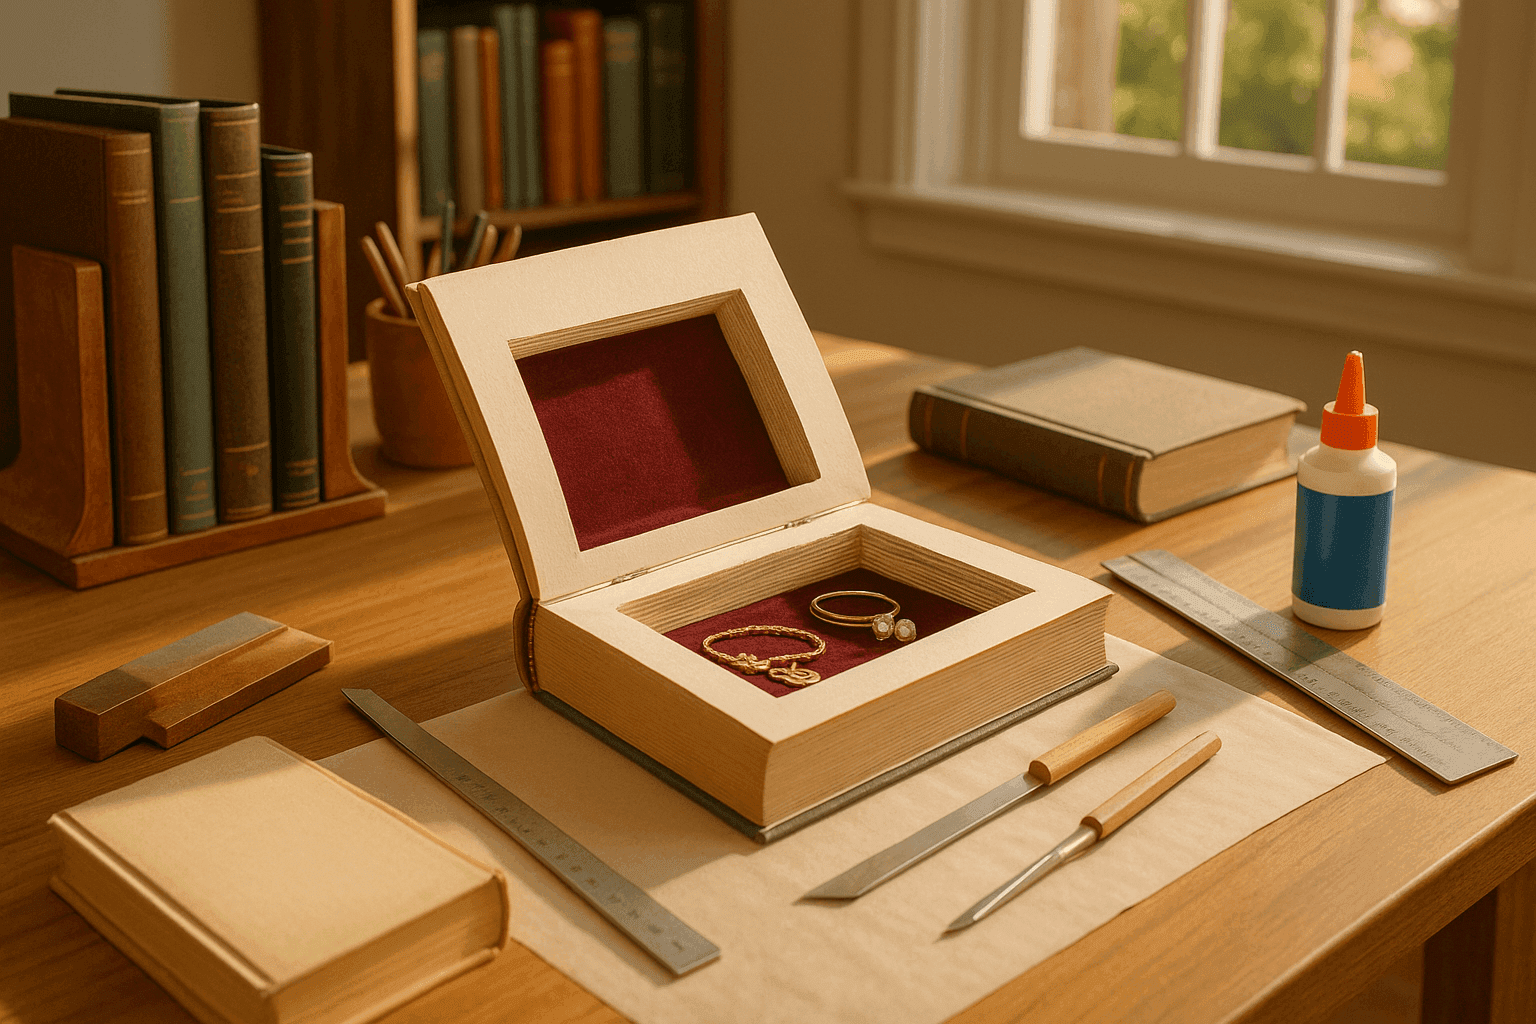
There's something delightfully clever about hiding valuables in plain sight within hollowed-out books that sit innocuously on shelves among your regular collection, fooling even the most observant guests. Transforming thick hardcover books into secret storage compartments turns outdated encyclopedias and forgotten novels destined for donation into functional pieces that serve double duty as both decorative shelf fillers and discreet hiding spots for jewelry, cash, or small treasures. This project appeals to our universal love of secrets and hidden passages, creating that satisfying feeling of having outsmarted potential snoops while giving new purpose to books that would otherwise gather dust or end up in landfills. The process requires patience and precision but delivers uniquely personal storage solutions that blend seamlessly into your existing decor while keeping precious items secure in the last place anyone would think to look.

Book Transformation Supplies

  • Book Selection: Thick hardcover books (at least 2 inches thick), outdated encyclopedias or vintage novels work perfectly
  • Cutting Tools: Sharp craft knife with replacement blades, metal ruler, cutting mat to protect work surface
  • Adhesive Materials: Mod Podge or white glue diluted with water, foam brush for application
  • Measuring Tools: Pencil for marking, ruler for precise measurements, clamps to hold pages during drying
  • Finishing Supplies: Sandpaper for smoothing edges, decorative paper or felt for lining compartment
  • Safety Equipment: Cut-resistant gloves, well-ventilated workspace, extra blades for clean cuts

Secret Compartment Creation

  1. Select starting page about 20-30 pages from the front cover to maintain authentic appearance
  2. Seal remaining pages together by brushing diluted glue along all exposed edges, clamping until dry
  3. Mark cutting area leaving 1-inch border from all edges for structural integrity
  4. Cut through glued pages using craft knife and ruler, removing small sections at a time
  5. Continue cutting and removing pages until compartment reaches desired depth, typically 1-1.5 inches from back cover
  6. Smooth interior walls with sandpaper, removing rough edges and paper fragments
  7. Seal inside compartment with additional glue coats for durability and clean appearance
  8. Line compartment with decorative paper or felt for finished look that protects stored items
DESIGNER TIP

Professional book artists recommend choosing books with titles that match your interests or decor theme so they blend naturally on shelves rather than looking suspiciously random. For the cleanest cuts and easiest process, let glued pages dry completely overnight before beginning to hollow – rushing this step creates frustration as pages separate and shift during cutting. The secret to book safes that truly fool observers is maintaining the natural spine curve and aged appearance rather than making them look obviously altered – store them upright between regular books on shelves where they disappear into your collection rather than sitting alone where they draw attention.

Related Content

DIY Projects

01 April 2026

Post

Stand Tall: Build a Wooden Plant Stand for $10

Four legs + a few cross braces + 90 minutes = a minimalist plant stand that looks $60 and costs $10 to build. Make three at different heights and go. ...

DIY Projects

04 April 2026

Post

Set in Stone: Make Handprint Stepping Stones with Kids

A mold, a bag of concrete, and one small hand — the $15 garden project that takes 45 minutes to make and becomes one of your most treasured possessions. ...

DIY Projects

04 April 2026

Post

Mirror, Mirror: Make Disco Ball Planters That Dazzle

Make Disco Ball Planters That Dazzle...

DIY Projects

07 April 2026

Post

For the Birds: Make Homemade Suet Cakes for $10

Lard + peanut butter + seeds + a muffin tin = 12 homemade suet cakes for $10. Make a batch in 20 minutes and watch the birds go absolutely frantic....

DIY Projects

15 April 2026

Post

Hang It Up: Build a Wall-Mounted Herb Drying Rack

Angled dowels + a 1x6 backboard + one hour = a herb drying rack that preserves your harvest and looks great doing it....

DIY Projects

07 May 2026

Post

Paint Meditative Watercolor Plant Portraits for $15

One garden leaf, a brush, and twenty minutes of slow looking — a watercolor botanical practice that costs $15 and lasts all season....

DIY Projects

06 May 2026

Post

Build a Wooden Garden Tool Caddy for $12

One 1×8 board, a jigsaw, and 90 minutes builds the garden caddy that ends the shed round-trip forever — for just $12. ...

DIY Projects

05 May 2026

Post

Make a Paper Flower Garland for Parties for $8

Stack, fold, fluff — fifteen tissue paper blooms strung on jute twine transforms any outdoor space into a party for just $8. ...

DIY Projects

05 May 2026

Post

Make a Tissue Paper Fiesta Banner for Under $5

Stack tissue paper, fold accordion-style, snip a pattern, unfold — twelve fiesta banner panels for under $5 in about an hour....

DIY Projects

04 May 2026

Post

Turn Wooden Crates into Rolling Under-Bed Storage for $12

A wooden crate + four swivel casters + a knotted rope handle = rolling under-bed storage that looks boutique for just $12. ...

DIY Projects

02 May 2026

Post

Sew Lavender Sachets for Drawers & Closets for $8

Tuck dried lavender sachets in every drawer and closet for natural scent and moth protection that lasts all year — whole batch under $8....

DIY Projects

27 April 2026

Post

Turn Thrift Store Frames into Serving Trays for $8

Thrift store frame + two drawer pulls + decorative paper = a boutique-worthy serving tray for $8. Swap the insert anytime. ...

DIY Projects

22 April 2026

Post

Feed the Birds: Build a Platform Bird Feeder for $12

A base board, four corner lips, two posts, and a roof — the $12 platform bird feeder built in 90 minutes that attracts more species than any feeder you can buy....

DIY Projects

21 April 2026

Post

Banner Day: Sew Fabric Bunting Banners for $8

Fabric scraps + pinking shears + ribbon + one straight stitch per flag = a handmade bunting banner for $8 that guests always ask where you bought....

DIY Projects

18 April 2026

Post

Silver Lining: Make Vintage Silverware Wind Chimes

Thrift store silverware + driftwood + an hour = a wind chime that sounds better than boutique versions three times the price....
Terms and ConditionsDo Not Sell or Share My Personal InformationPrivacy PolicyPrivacy NoticeAccessibility NoticeUnsubscribe
Copyright © 2026 DIY HomeBoost