


Upcycle Sweater Sleeves Into Adorable Pumpkin Wraps
Transform old sweaters into cozy autumn pumpkin outfits with buttons and felt details
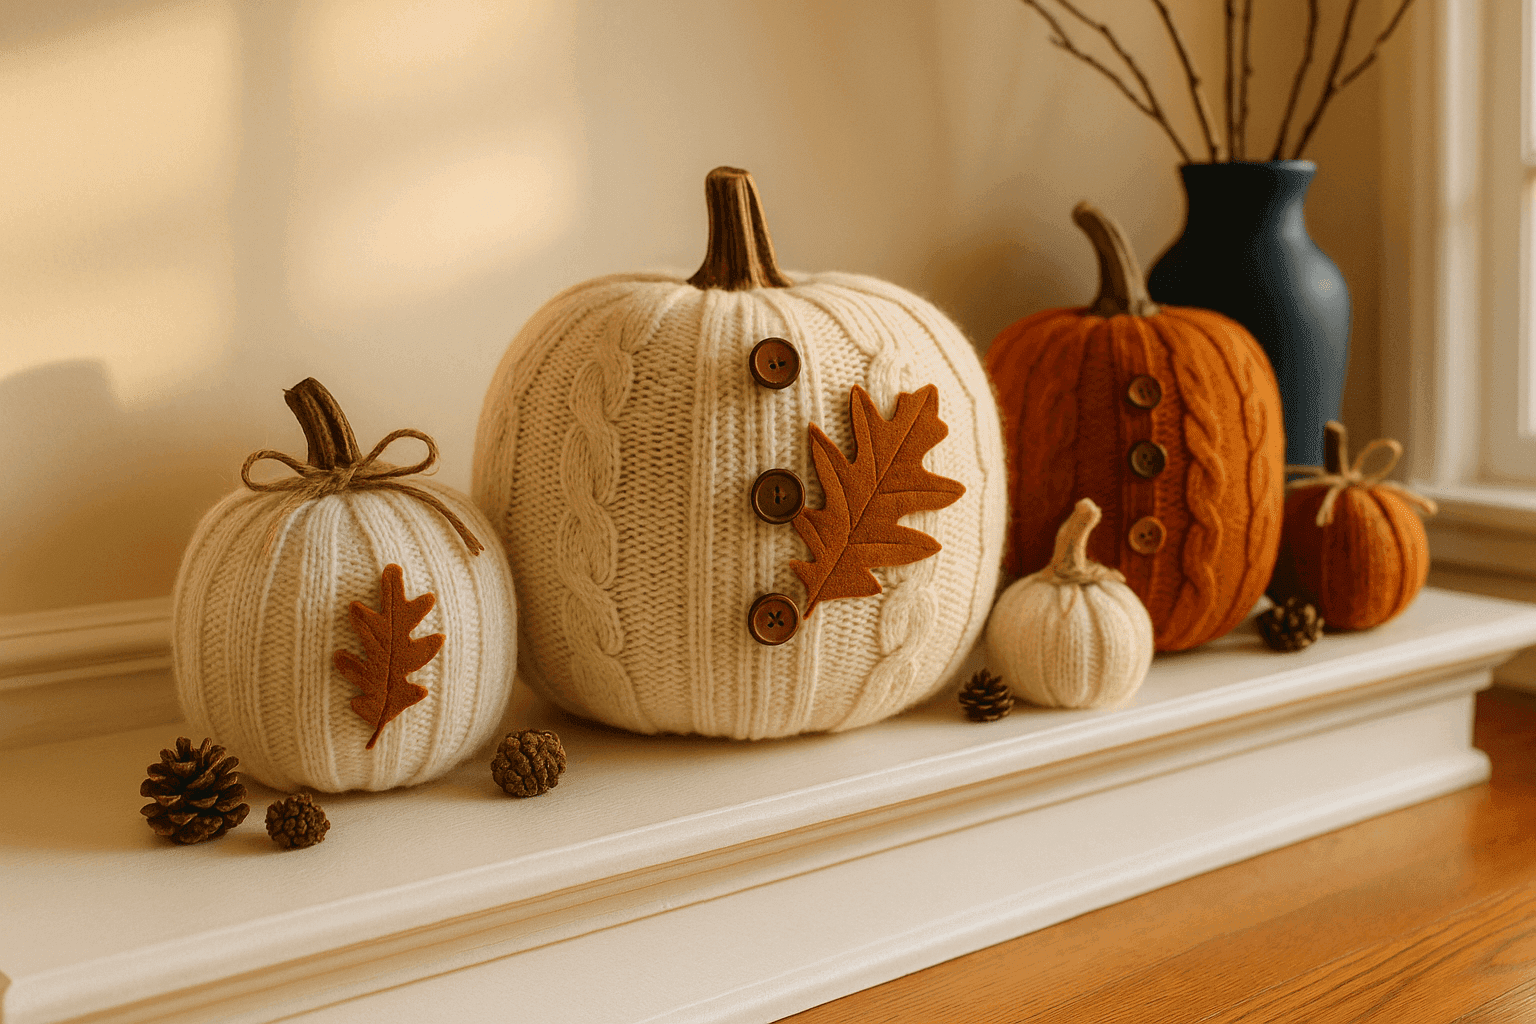
There's something irresistibly charming about pumpkins dressed in cozy sweater sleeves like they're bundled up for autumn weather, and this craft brilliantly solves two problems at once—it gives new life to worn-out sweaters you can't bear to throw away while creating unique fall decorations that feel infinitely more personal than anything you'd find at a store. The beauty of this project is its incredible versatility because sweater sleeves naturally stretch to fit various pumpkin sizes, the knit texture adds warmth and coziness to your fall decor, and you can customize each wrapped pumpkin with buttons, felt leaves, or other embellishments that match your personal style. This upcycling craft costs virtually nothing if you're using sweaters already destined for donation or the trash, takes about 15-20 minutes per pumpkin, and produces decorations that work beautifully from September through Thanksgiving without feeling specifically Halloween or harvest-themed. What I absolutely love about this project is how it transforms something you might feel guilty about discarding—that favorite sweater with holes or irreparable stains—into something genuinely useful and decorative that lets you keep enjoying the texture, color, and memories associated with the original garment. The textural contrast between smooth pumpkin skin and soft knit fabric creates visual interest that makes these wrapped gourds far more engaging than plain pumpkins, and the project is so simple that even crafting novices can achieve professional-looking results on their first attempt.
Craft Supplies Needed
- Sweaters to Upcycle:
- Old sweaters in fall colors—cream, rust, mustard, brown, gray (from your closet or thrift stores)
- Cable knit sweaters for interesting texture
- Chunky knits for cozy oversized look
- Fine knits for sleeker appearance
- Pumpkins and Gourds:
- Real pumpkins in various sizes ($3-8 each)
- Craft pumpkins for reusable decorations ($5-12 each)
- Decorative gourds for variety ($2-5 each)
- White pumpkins for neutral palette
- Embellishments:
- Assorted buttons in coordinating colors ($3-5)
- Felt sheets in brown, green, orange ($2-4)
- Twine or jute for wrapping stems ($2-3)
- Small pinecones or acorns (foraged or $3-5)
- Fabric glue or hot glue gun
- Tools:
- Sharp fabric scissors
- Needle and thread (optional for sewing embellishments)
- Pins for positioning before gluing
- Measuring tape
Creating Sweater Pumpkins
- Cut Sweater Sleeves: Using sharp scissors, cut sleeves from your old sweaters leaving about an inch of shoulder seam attached to maintain structure—the sleeve length should match or slightly exceed your pumpkin's height so you have fabric to tuck or fold at top and bottom for a neat finish.
- Choose Pumpkin Pairings: Match sleeve sizes to pumpkin dimensions by testing the stretch—sleeves should fit snugly enough to stay in place without sliding but not so tight that they distort the knit pattern or compress the pumpkin shape awkwardly, creating an unflattering lumpy appearance.
- Slide Sleeve Over Pumpkin: Gently stretch the sleeve opening and work it down over your pumpkin from top to bottom, adjusting as you go to ensure the most interesting knit patterns (like cables or textured stitches) face forward where they'll be most visible in your final display arrangement.
- Arrange and Tuck Fabric: Once the sleeve is positioned, tuck excess fabric at the top around the pumpkin stem creating a collar effect, and either tuck or trim the bottom edge so it sits flush with your display surface—the goal is a fitted look that appears intentional rather than sloppy or hastily wrapped.
- Create Felt Leaves: Cut simple leaf shapes from green, brown, or rust-colored felt using classic oak or maple leaf silhouettes, making them proportional to your pumpkin size—you can cut freehand for organic variation or use a template for consistent shapes across multiple pumpkins in a collection.
- Add Button Details: Position buttons on the sweater sleeve as decorative accents, either in a vertical line down the front like a cardigan, clustered randomly for whimsy, or strategically placed to hide any stains or holes in the original sweater fabric you're upcycling into decoration.
- Attach Embellishments: Use hot glue or fabric glue to permanently secure felt leaves near the stem, attach buttons to the knit fabric, and add any additional decorative elements like twine wrapped around stems or small pinecones tucked into the top—work quickly with hot glue since it sets fast on fabric.
- Style Your Display: Arrange your collection of sweater-wrapped pumpkins on a mantel, console table, or porch steps, mixing sizes and sweater colors for visual interest while keeping the cohesive theme of cozy fall style—consider grouping them with unadorned pumpkins, real autumn leaves, or wooden elements for complete seasonal vignettes.
Interior designers who specialize in seasonal styling recommend the "family portrait" approach to creating cohesive sweater pumpkin collections that look intentionally curated rather than randomly assembled. Choose sweaters from a single color family but in varying shades—for example, cream, oatmeal, taupe, and mushroom brown create sophisticated monochromatic groupings, or work with a warm palette of rust, burnt orange, mustard, and caramel for classic autumn vibes. This color discipline creates visual harmony even when mixing different knit patterns and textures. For maximum personality, use sleeves from sweaters with sentimental value—your college sweatshirt, a beloved cardigan with moth holes, or even a baby sweater from your now-grown children. Adding a small tag or label explaining each sweater's story transforms your pumpkin display into a conversation starter that shares family history and memories. The construction trick that makes these look professional rather than crafty is paying attention to the knit direction—position cable knits or ribbing to run vertically on the pumpkin for a slimming effect, and make sure any pattern repeats are centered on the front-facing side. If working with real pumpkins that you'll compost after the season, choose sweaters you're truly ready to part with since fabric will absorb moisture and odors as pumpkins age. For craft pumpkins that you'll reuse annually, store the sweater sleeves separately from the foam pumpkins during off-season to prevent the elastic degradation that happens when knits remain stretched for months, ensuring your decorations maintain their shape and appeal for many autumns to come.


