Home Improvement

Recent Content

Space Savers: Make Your Own Seed Tape for $5

Space Savers: Make Your Own Seed Tape for $5

Flour paste + toilet paper + tiny seeds = perfectly spaced rows with zero thinning. Make a full season of seed tape in 30 minutes for under $5.

Rise Up: Build a Garden Trellis Arch This Weekend

Rise Up: Build a Garden Trellis Arch This Weekend

Stop growing flat when you could grow up. A handbuilt trellis arch doubles your garden space, supports serious vine crops, and looks stunning all season.

Stand Tall: Build a Wooden Plant Stand for $10

Stand Tall: Build a Wooden Plant Stand for $10

Four legs + a few cross braces + 90 minutes = a minimalist plant stand that looks $60 and costs $10 to build. Make three at different heights and go.

Steeped in Green: Succulents in a Vintage Teacup

Steeped in Green: Succulents in a Vintage Teacup

A thrifted teacup, a handful of gravel, and one tiny succulent — the desk décor that looks precious, costs under $15, and barely needs watering.

Counter Culture: Turn a Dresser into a Kitchen Island

Counter Culture: Turn a Dresser into a Kitchen Island

A thrifted dresser + butcher block top + locking casters = a custom kitchen island for $60–$100. Skip the $400 store version and build character instead.

Cable Control: End Tangled Cord Chaos with Free Tubes

Transform recycling bin cardboard into a perfectly organized cord drawer

Organized drawer showing neatly coiled charging cables stored upright in labeled toilet paper tubes with clear handwritten labels
HOME IMPROVEMENT

That drawer filled with mysteriously tangled cords you can never identify when you actually need them doesn't have to be a permanent source of frustration. While cable organization systems at container stores cost $20-30 and still leave you guessing which cord is which, toilet paper tubes provide the perfect solution for exactly zero dollars. The cylindrical shape prevents tangling while keeping each cable coiled and contained, and labeling them means you'll instantly grab the right charger instead of testing three wrong ones first. This isn't just about aesthetics—it's about reclaiming the minutes you waste untangling cords and the mental energy spent managing unnecessary clutter. The tubes fit perfectly in standard drawers, stack efficiently in bins, and can be decorated to match your space if plain cardboard doesn't spark joy. Best of all, you're already generating the raw materials, so this organization upgrade literally pays for itself while keeping cardboard out of recycling bins.

What You'll Need

  • Tube Collection (free from recycling):
    • Toilet paper tubes (standard size)
    • Paper towel tubes (for longer cables)
    • Collect 8-12 tubes depending on cable quantity
  • Labeling Supplies:
    • Permanent marker or label maker
    • Masking tape or printable labels
    • Colored markers for color-coding (optional)
  • Optional Enhancements:
    • Decorative paper or washi tape for covering tubes
    • Small storage box or drawer organizer tray
    • Velcro cable ties for extra-long cords
    • Spray paint for uniform appearance

Organize Your Cables

  1. Collect all the charging cables, spare cords, and adapters currently living in various drawers, bags, and mystery locations throughout your home—seeing everything together reveals what you actually have.
  2. Test each cable to verify it still works properly and matches its apparent purpose, because there's no point organizing broken or obsolete cords that should head straight to electronics recycling.
  3. Sort cables into categories like phone chargers, laptop power cords, USB cables, HDMI cables, and device-specific adapters—grouping similar items makes the system intuitive to maintain.
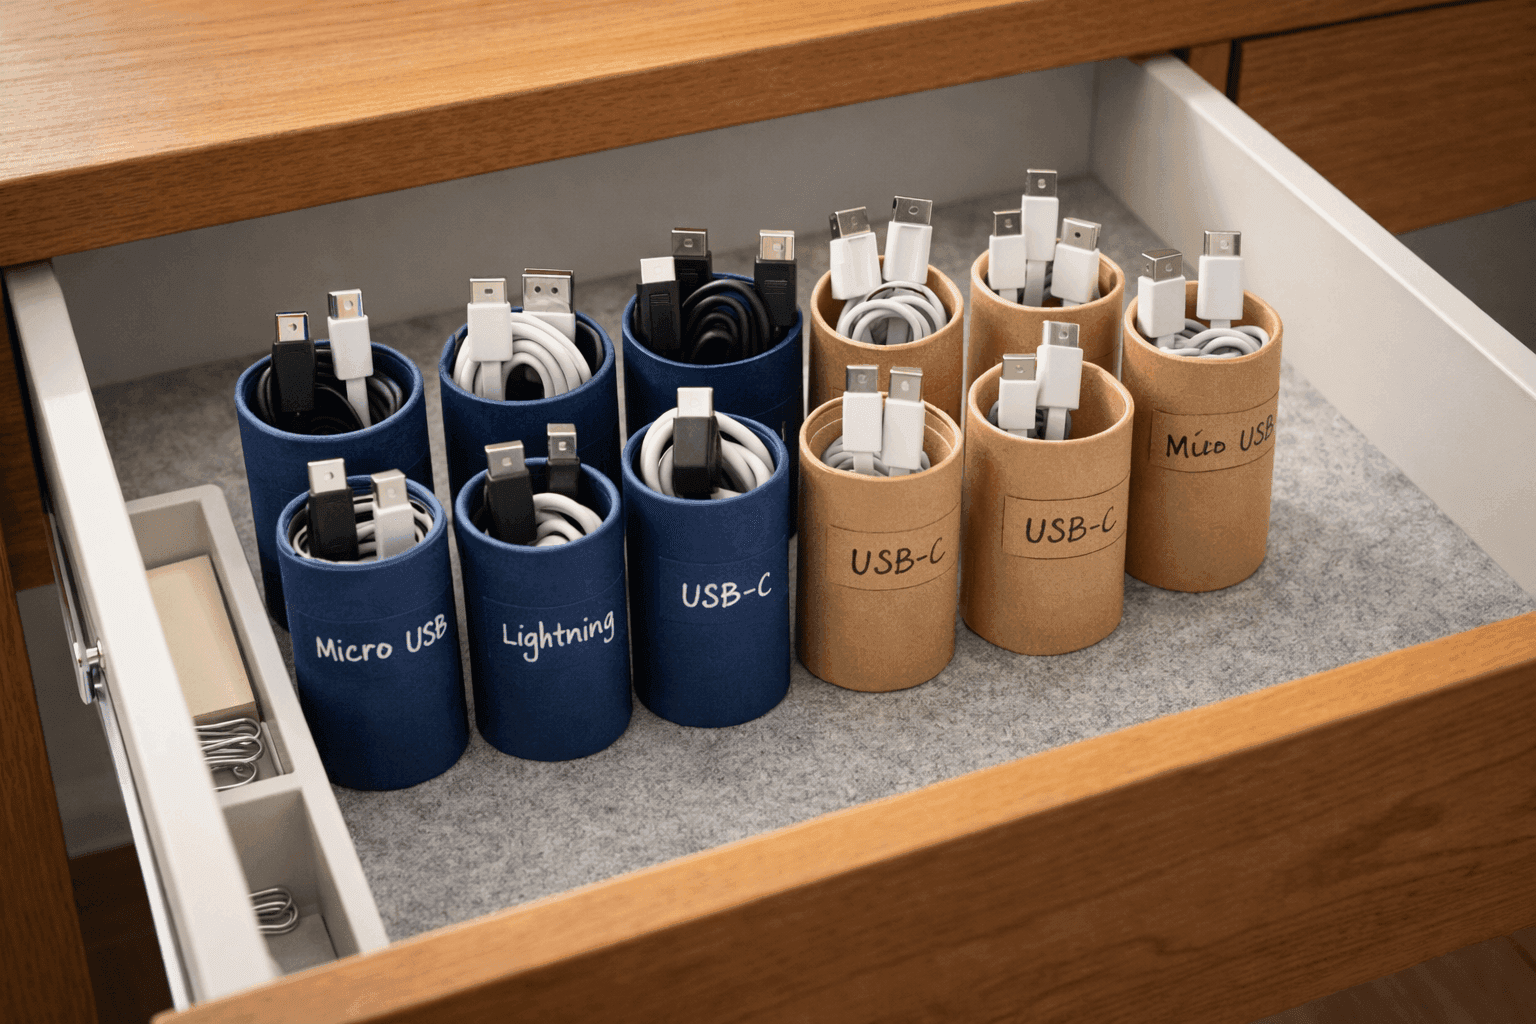
  4. Label each toilet paper tube clearly with the cable type and device it serves, using descriptions like "iPhone Charger," "MacBook Power," or "Kindle Cable" so anyone in the household can find what they need.
  5. Coil each cable neatly using the over-under method to prevent internal wire damage, keeping the coil diameter slightly smaller than the tube's interior for a snug fit that won't unravel.
  6. Insert coiled cables into their designated tubes, allowing the connector ends to peek out slightly from the top for easy identification and removal without dumping out the entire cable.
  7. Arrange tubes upright in a drawer or storage box, positioning frequently-used cables toward the front and seasonal or backup cables toward the back for efficient access.
  8. Establish a return policy with your household that cables must go back in their tubes after use, because even the best organization system fails without consistent maintenance habits.
DESIGNER TIP

Professional organizers recommend creating a master inventory list that lives inside the drawer or storage box, noting which cables you have and their locations—when someone inevitably pulls out five tubes looking for the right one, the list eliminates guesswork. For a more polished look, cover tubes with decorative paper or spray paint them in coordinating colors before labeling, transforming functional recycling into attractive organization that doesn't scream "I'm storing things in toilet paper tubes." If you have exceptionally long cables like extension cords or projector cables, cut paper towel tubes to custom lengths rather than forcing oversized coils into standard tubes. Consider adding a "cable hospital" tube for damaged cords awaiting repair or recycling, preventing broken cables from contaminating your functional collection.

Related Content

Home Improvement

03 April 2026

Post

Fix a Wobbly Fence Post Before It Falls

A wobbly fence post is one storm away from a sagging panel. Two hours and $20 in fast-setting concrete fixes it permanently before the damage gets worse....

Home Improvement

03 April 2026

Post

Down the Drain: Clean Your Garbage Disposal Right

Baking soda + vinegar + ice + citrus peel = a clean, odor-free disposal in 20 minutes. Plus the Allen wrench trick that clears most jams in under 3 minutes. ...

Home Improvement

05 April 2026

Post

Clean Sweep: Power Wash Your Front Porch in 90 Minutes

A $40 rental and 90 minutes turns a drab, dingy front porch into something genuinely welcoming. Power washing is the fastest curb appeal upgrade there is. ...

Home Improvement

05 April 2026

Post

Cool Running: Clean Your Fridge Coils in 15 Minutes

15 minutes and a $6 brush twice a year is all it takes to lower your energy bill and add years to the most expensive appliance in your kitchen. ...

Home Improvement

08 May 2026

Post

Fix a Wobbly Toilet Seat in 5 Minutes for Free

A wobbly toilet seat has two plastic caps hiding two loose bolts. One screwdriver, five minutes, and it's solid again — for free. ...

Home Improvement

08 May 2026

Post

Fix a Sticky Deadbolt in 15 Minutes for Free

A sticky deadbolt needs graphite lubricant and a screwdriver — not a locksmith. Fix it in 15 minutes for free before it fails you....

Home Improvement

03 May 2026

Post

Organize Your Refrigerator with Clear Bins for $30

Clear bins + one free Sunday hour = a fridge where nothing hides, nothing gets wasted, and groceries actually last. Under $30. (125 characters)...

Home Improvement

03 May 2026

Post

Clean Grimy Window Tracks in 20 Minutes for Free

Baking soda + white vinegar + an old toothbrush = window tracks that slide clean and smooth in 20 minutes flat. Costs nothing. ...

Home Improvement

01 May 2026

Post

Repair Loose Deck Boards Before Summer for $8

Popped nails, flexing boards, and squeaky spots are an hour away from fixed. A $8 box of deck screws handles all of it. ...

Home Improvement

26 April 2026

Post

Grain Expectations: Polish Stainless Steel for Under $5

Two drops of mineral oil + a dry microfiber cloth + the direction of the grain = streak-free stainless steel that stays fingerprint-free for days. Under $5. ...

Home Improvement

26 April 2026

Post

Clean Your Dryer Vent in 20 Minutes for Under $15

A clogged dryer vent means longer cycles, higher bills, and real fire risk. A $10 brush and 20 minutes fixes all three. ...

Home Improvement

24 April 2026

Post

Patch Things Up: Fix a Torn Screen in 10 Minutes

A $6 adhesive screen patch kit and ten minutes is all it takes to fix the torn screen you've been ignoring all summer. Peel, press, smooth — done. ...

Home Improvement

24 April 2026

Post

Repair a Dripping Outdoor Spigot for Under $5

A dripping outdoor spigot wastes hundreds of gallons a month. A $2 washer and 30 minutes fixes it for good before summer. ...

Home Improvement

17 April 2026

Post

Don't Gutter Up: Fix Sagging Gutters for $12

A $12 pack of hidden hangers and two hours stops a sagging gutter from becoming a foundation problem. The repair is easier than you think — here's exactly how. ...

Home Improvement

17 April 2026

Post

Table Manners: Fix a Wobbly Table in 30 Minutes

Flip the table over, find the actual cause of the wobble, and apply the right fix. Four specific problems, four specific solutions — done in 30 minutes....
Terms and ConditionsDo Not Sell or Share My Personal InformationPrivacy PolicyPrivacy NoticeAccessibility NoticeUnsubscribe
Copyright © 2026 DIY HomeBoost