


Cut Heating Bills With This Simple Fan Direction Switch
Reverse your ceiling fans to push warm air down and improve winter heating efficiency
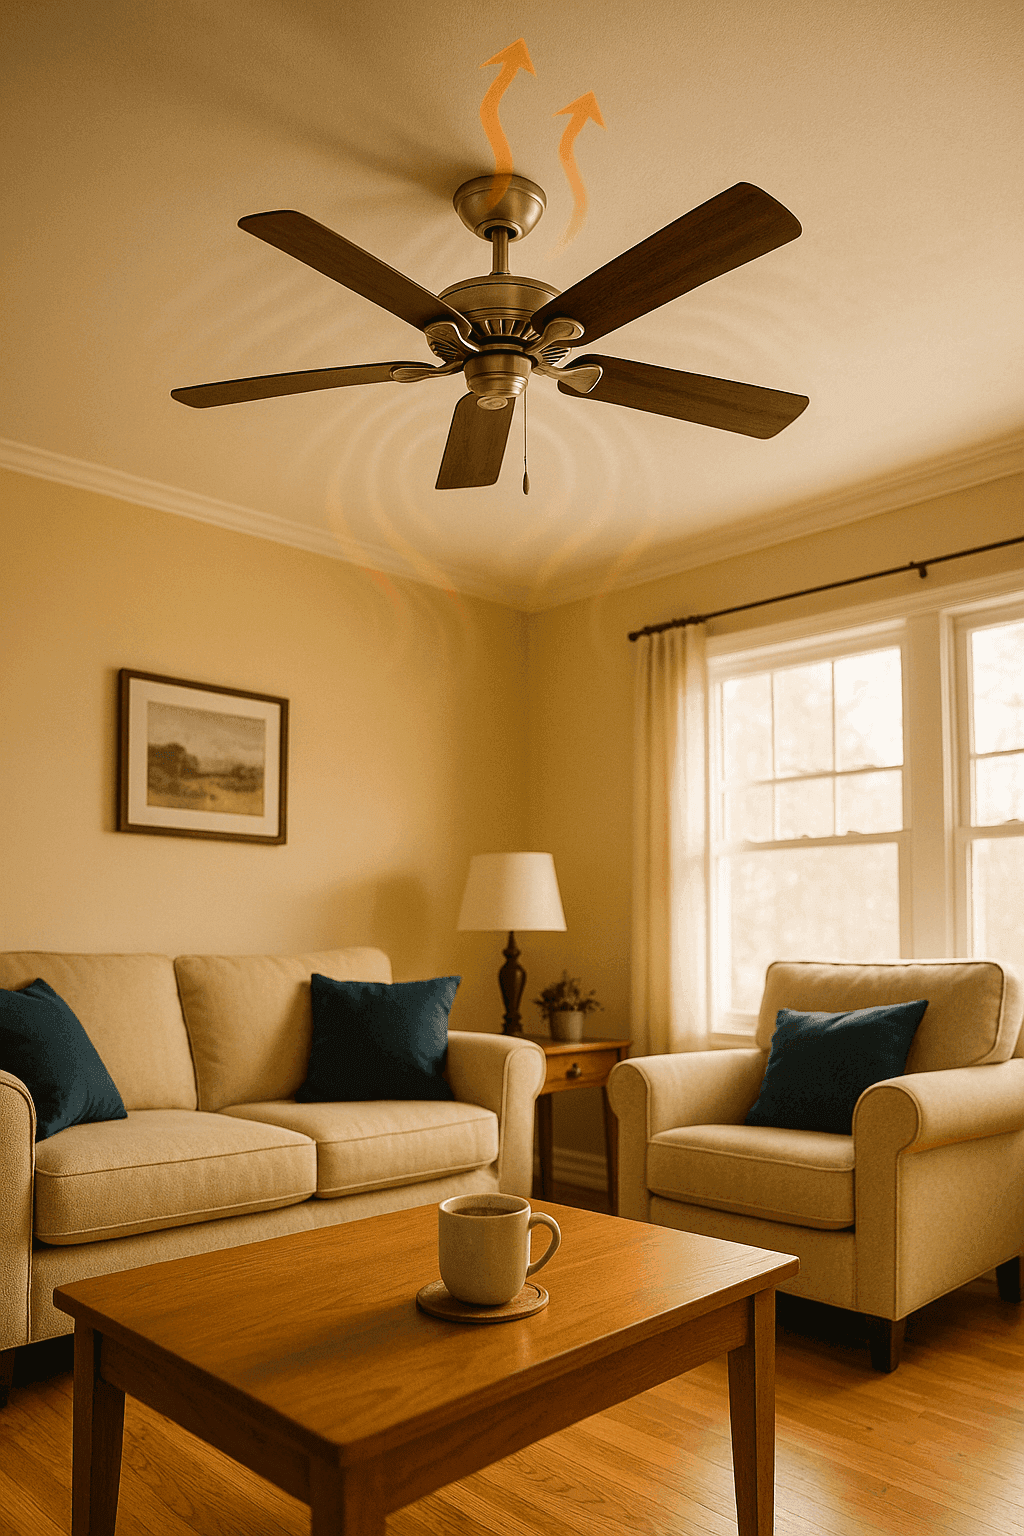
Most homeowners have no idea that the ceiling fans they turn off every October are actually wasting a massive opportunity to improve heating efficiency and reduce energy bills throughout winter. Here's the physics that matters—warm air naturally rises to your ceiling where it does absolutely nothing for the people living eight feet below, but running your ceiling fan in reverse mode (clockwise when looking up) gently pushes that trapped warm air back down without creating the cooling breeze effect that makes summer fans so refreshing. This simple directional switch can reduce your heating costs by 10-15% in rooms with ceiling fans, costs exactly zero dollars to implement, and takes literally two minutes per fan once you know where to find that tiny reverse switch. What makes this one of my absolute favorite fall home tasks is the immediate comfort improvement you feel—rooms with high or vaulted ceilings suddenly feel warmer at the same thermostat setting because you're recirculating the heat your system already produced instead of letting it pool uselessly above your heads. The best part is that this isn't some complicated HVAC modification requiring professional help or special tools—you're simply flipping a switch that's already on your fan, adjusting the speed to low for optimal circulation without drafts, and enjoying the results for the next five months until you reverse it again in spring. You're essentially getting free supplemental heating by redistributing the warmth you've already paid to create, which might be the easiest energy efficiency upgrade you'll ever make.
What You Need to Know
- Understanding Fan Direction:
- Summer (counterclockwise): Creates downward breeze that cools by evaporation
- Winter (clockwise): Pulls air up and pushes warm ceiling air down the sides
- Remember: Stand under fan and look up to determine blade direction
- Locating the Reverse Switch:
- Usually on the motor housing between the blades and ceiling
- Small slide switch or toggle, often black or gray
- Some fans have remote controls with reverse buttons
- Wall controls on newer fans may include reverse function
- Optimal Winter Settings:
- Direction: Clockwise (when looking up from below)
- Speed: Low setting prevents drafty feeling
- Timing: Run whenever heating system is active
- Best in: Rooms with ceilings 8 feet or higher
- Safety Considerations:
- Turn fan completely off before changing direction
- Use stable step ladder, never stand on furniture
- Have someone spot the ladder if needed
- Wait for blades to stop completely before touching switch
Reversing Your Ceiling Fans
- Turn Off the Fan: Use the wall switch, pull chain, or remote to completely shut off the fan and wait for the blades to come to a complete stop—never attempt to change direction while the fan is running as this can damage the motor or cause injury.
- Set Up Safe Access: Position a sturdy step ladder directly under the fan motor housing, ensuring all four legs are firmly on the floor and the ladder is fully opened and locked—have someone hold the ladder if you feel unsteady at heights.
- Locate the Switch: Climb the ladder and examine the motor housing between the blades and ceiling mount, looking for a small slide switch usually labeled with directional arrows or summer/winter markings—use a flashlight if the switch is in shadow or hard to see clearly.
- Flip the Direction: Slide or toggle the switch to the opposite position from its current setting, feeling for the definite click that indicates it's fully engaged in the new position—if the switch feels stuck, don't force it, as some older fans require gentle wiggling.
- Test the New Direction: Climb down safely, move the ladder away, then turn the fan on at low speed and stand directly underneath looking up to verify the blades are rotating clockwise—you should feel minimal air movement directly below unlike summer's strong downward breeze.
- Adjust Speed Setting: Set the fan to low speed for winter operation since you want gentle circulation rather than noticeable air movement—higher speeds create drafts that make rooms feel cooler despite redistributing warm air, defeating the purpose entirely.
- Repeat for All Fans: Go through your entire home reversing every ceiling fan, paying special attention to rooms with high or vaulted ceilings where heat stratification is most dramatic—even rooms you don't use daily benefit from better heat distribution.
- Mark Your Calendar: Set a reminder in your phone for late October to reverse fans to winter mode and late April to switch back to summer mode—making this seasonal adjustment automatic ensures you're always operating fans in the most efficient direction for current conditions.
Energy auditors recommend the strategic fan usage approach that maximizes heating efficiency while avoiding common mistakes that waste electricity. Only run ceiling fans in occupied rooms since fans don't actually heat air—they simply redistribute existing warmth, so running them in empty spaces provides zero benefit while consuming power. For optimal results in rooms with ceiling heights above 10 feet, run fans continuously during heating season since dramatic temperature stratification in tall spaces means significant heat is trapped at the ceiling even when the heating system isn't actively running. In standard 8-9 foot ceiling rooms, synchronize fan operation with your heating system by using smart switches or timers so fans circulate warm air during and immediately after heating cycles but don't run unnecessarily when the system is off for extended periods. The placement secret that nobody talks about is that ceiling fans work most effectively in rooms where furniture arrangement creates good air circulation pathways—avoid placing tall bookcases or room dividers directly under fans as these obstacles block the gentle air current from reaching floor level where people actually benefit from the redistributed warmth. If you have a fan with visible dust buildup on the blades, clean it before reversing for winter since accumulated dust reduces efficiency and gets redistributed throughout the room when you start running the fan regularly again.


