


Fix Window Screens for Fresh Air Season for $10
Three fixes for three damage levels — most screens are back in service in under 30 minutes
The window screens that have been sitting in storage or rattling in their frames all winter have a way of revealing their damage the moment you want to open a window for the first time in spring — and the damage tends to be exactly one size too large to ignore. A torn screen isn't just an aesthetic problem; it's an open invitation to every mosquito and fly in your neighborhood from May through September, which means fixing it now, before you need it, is one of the most practical things you can do for your spring comfort. The good news is that window screen repair covers a clear spectrum from a two-minute nail polish fix for a pinhole to a full re-screening for a completely shredded frame, and none of it requires more than basic tools and $3–15 in materials depending on the damage level. Most homeowners have at least two or three screens worth fixing every spring, and working through all of them in a single session before the weather turns takes less than an afternoon.
What You'll Need
- For Pinholes and Tears Under 1 Inch
- Clear nail polish — apply directly over the damaged area in thin overlapping coats; free if you already own it, ~$2–3 if not
- Pre-cut adhesive screen repair patches — peel-and-stick patches in fiberglass or aluminum mesh sized 3x3 inches cover most small tears cleanly with no tools required (~$3–5 for a multi-pack)
- For Tears 1–4 Inches
- Screen repair patch material — matching fiberglass or aluminum mesh cut from a roll or repair kit; fiberglass patches on fiberglass screens and aluminum on aluminum screens for a color and texture match (~$4–8 for a roll)
- Clear waterproof adhesive or screen repair glue for securing patch edges after weaving
- Sharp scissors for cutting the patch to size and fraying the edges cleanly
- For Full Screen Replacement
- Fiberglass screen roll — the most forgiving material for DIY re-screening; easier to work taut than aluminum and doesn't crease permanently if you need to reposition (~$8–15 for a 36-inch wide roll that covers 3–5 standard window screens)
- Spline — the rubber or vinyl gasket that holds screen material in the frame channel; measure the width of your existing spline with a ruler and match it exactly, since even a 1mm size difference affects how well the screen is held (~$3–5 for a 25-foot roll)
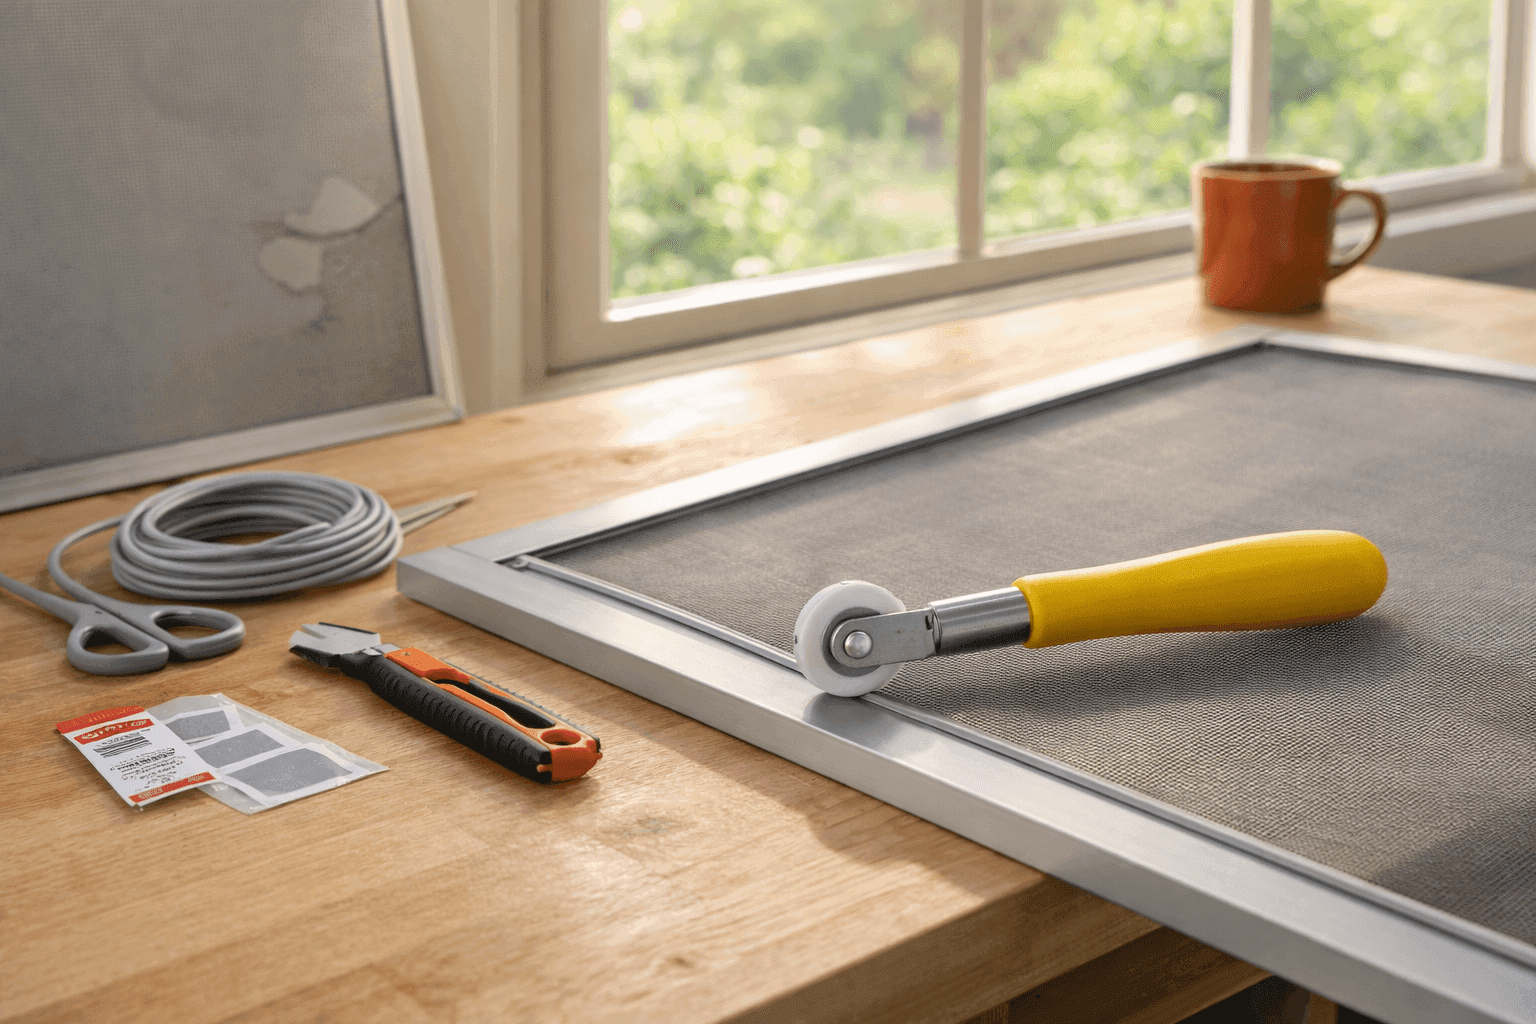
- Spline roller tool — a double-ended roller with a concave wheel for pressing spline into the channel; this $4–7 tool is the only reason re-screening is achievable without professional help
- Flathead screwdriver for prying out old spline
- A utility knife for trimming excess screen material flush with the frame edge after re-screening
- A flat work surface larger than the screen frame — a picnic table or workbench works; a carpet or soft surface is not suitable as it prevents the screen from lying perfectly flat during re-screening
- Total Cost Per Screen
- $3–5 for nail polish or adhesive patch repairs; $8–15 for patch kit medium tears; $12–20 for full re-screening including spline and screen roll (tools pay back across multiple screens)
How to Fix Them
- Diagnose each screen before buying any materials — lay every screen flat and assess each damage site: pinholes and tears under an inch across get the nail polish or adhesive patch treatment; tears between one and four inches get a woven patch repair; anything larger, badly frayed over a wide area, or with a bent or cracked frame needs full re-screening. Sorting screens into these three categories first means one hardware store trip covers everything rather than multiple partial returns.
- Fix small holes with nail polish by dabbing two or three thin coats directly over the damaged mesh, allowing each coat to dry fully before applying the next. The polish fills the gaps between broken mesh strands and dries nearly invisible on fiberglass screens. For adhesive patches, clean the screen surface around the hole with a damp cloth, let it dry, then center the patch over the damage and press firmly from the center outward to eliminate air bubbles under the edges.
- Cut medium patches generously — the patch should extend at least one inch beyond the tear in every direction, giving you enough mesh to fray and weave into the surrounding screen. Cut the patch as a clean rectangle rather than following the tear shape — irregular patch shapes are harder to weave evenly and look less finished. Use sharp scissors rather than utility knife for cleaner mesh cuts that don't fray beyond where you intend.
- Fray and weave the patch edges by pulling out the outermost two or three strands from each of the four sides of the patch, creating a short fringe of individual wire or fiber strands around the perimeter. Thread these fringe strands through the existing screen mesh surrounding the tear, working methodically around all four sides, then fold the woven fringe flat against the screen face and apply a thin line of clear waterproof adhesive along all four patch edges to lock everything in place.
- Remove the old spline for full re-screening by working a flathead screwdriver under the spline at any corner and pulling it free along the full channel perimeter — it should come out as one continuous strip in most cases. If it breaks into pieces, work each section out individually. Inspect the frame channel for debris and wipe it clean before installing new screen; a clean channel is what allows the new spline to seat evenly without creating gaps or loose sections.
- Lay new screen material over the frame with at least two inches of overhang on all sides, then begin pressing the spline into the channel starting at one corner using the convex wheel of the spline roller tool. Work along one full side first, keeping the screen pulled taut by hand in the opposite direction as you roll — this is the step that determines whether the finished screen is smooth and taut or wrinkled and saggy, so go slowly and maintain consistent tension throughout.
- Work opposite sides in sequence rather than going around the frame continuously — press spline along the first long side, then pull taut and press the opposite long side, then the first short side, then the final short side. This opposite-side sequence is what keeps the screen tensioned evenly rather than progressively gathering toward the last corner, which is the most common re-screening mistake that produces a finished screen with one loose, rippled quadrant.
- Trim excess screen material by running a utility knife along the outer edge of the spline channel with light, steady pressure — the spline acts as a cutting guide and produces a clean straight edge when the knife is held at a low angle against the frame face. Make one clean pass rather than multiple tentative ones, and trim all four sides before reinstalling the screen in the window to check the tension from a normal viewing distance.
Window and door installers who re-screen professionally almost always use the spline roller's concave wheel — not the convex one — for the final press-down pass after the spline is seated, running it along the installed spline a second time to drive it fully flush with the frame channel surface. A spline that sits proud of the channel by even a millimeter creates a visible ridge and prevents the screen frame from seating flat in the window track, which causes the rattling and draft gaps that make a freshly re-screened window feel like it's still broken. Two passes with the roller — convex to seat, concave to flush — is the professional sequence that produces a screen that sits perfectly flat and reinstalls without any adjustment.


