Transform Any Window Into a Cozy Reading Retreat
Create custom cushions with hidden storage that turn drafty spots into inviting nooks
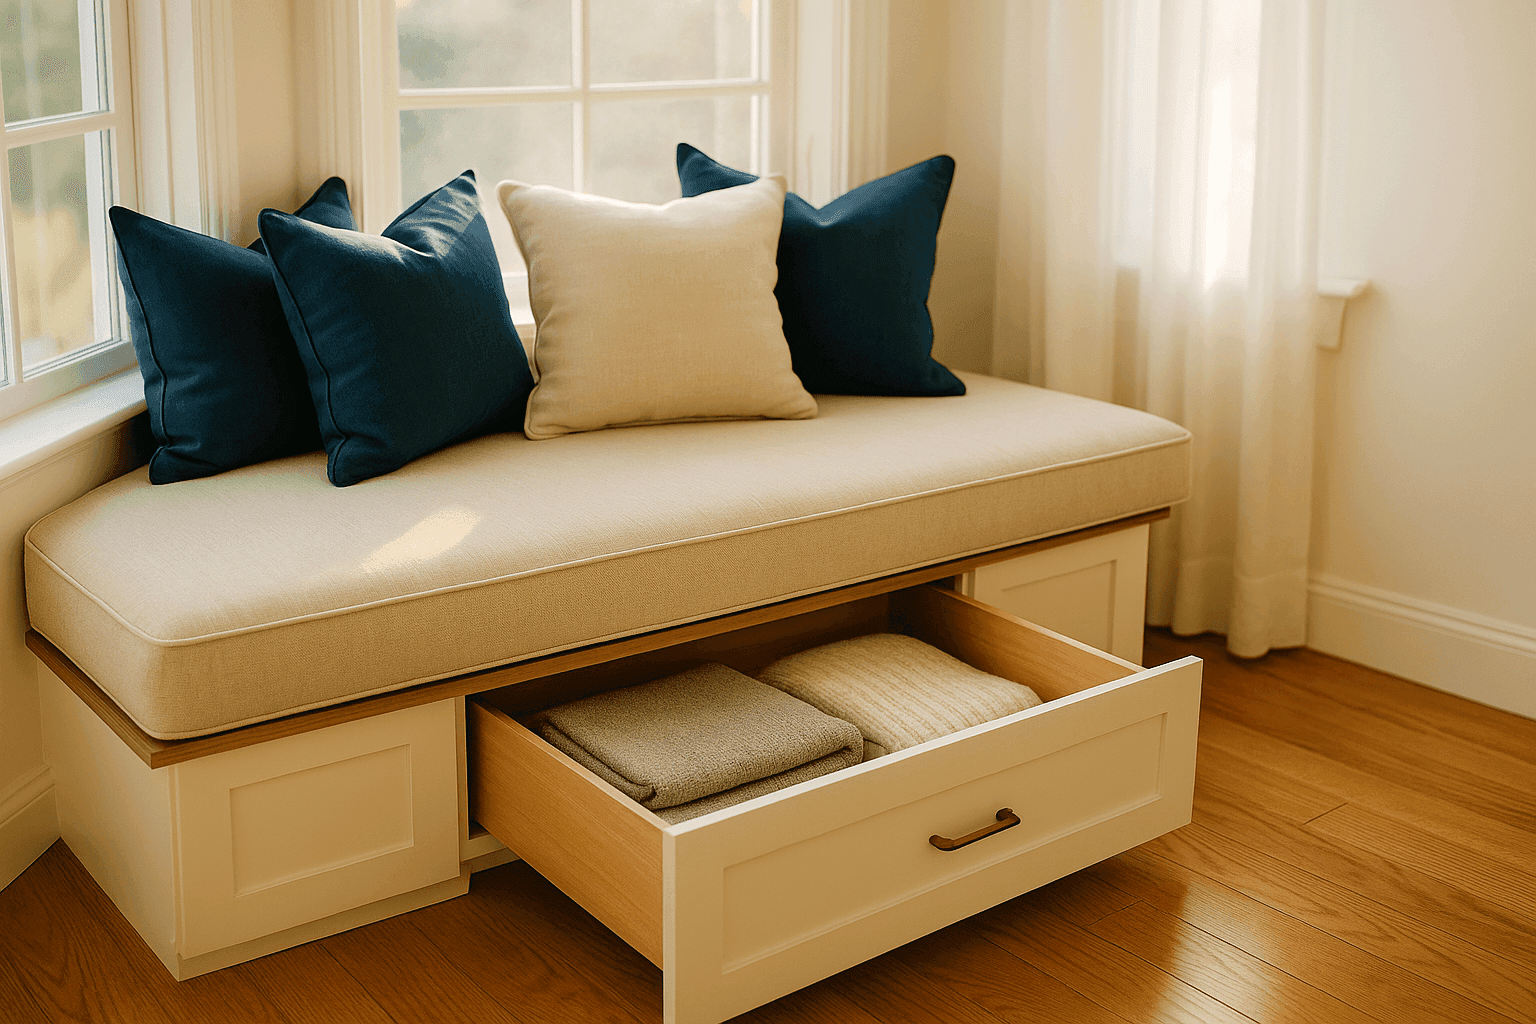
There's something absolutely magical about a window seat—that perfect spot where you can curl up with a book, watch the rain, or just daydream while natural light pours in around you. The challenge is that most window seats either don't exist in homes or they're just hard, uncomfortable ledges that look better than they feel, leaving that prime real estate completely wasted. Creating custom window seat cushions with hidden storage underneath solves both problems at once, transforming an underutilized or drafty window area into the coziest spot in your house while giving you clever space to stash blankets, pillows, and seasonal items. This project costs around $60-80 depending on fabric choice and cushion size, takes a weekend to complete even if you're not an experienced sewer, and delivers that high-end built-in look without any permanent construction. What I love most is how this upgrade makes you actually use that window space instead of just walking past it, creating a retreat within your home that becomes everyone's favorite spot the moment temperatures drop and cozy season begins.
Materials You'll Need
- Cushion Fabric:
- Upholstery-weight fabric (3-4 yards depending on window size, $25-40)
- High-density foam cushion (4 inches thick, cut to size, $30-50)
- Batting or quilt wadding for extra softness (1 yard, $8-12)
- Heavy-duty thread matching your fabric
- Storage Components:
- Wooden crate or storage bins that fit window depth ($15-25)
- Or build simple box frame with plywood ($20-30 materials)
- Cabinet handles or rope pulls for easy access ($5-8)
- Fastening Materials:
- Heavy-duty zipper (length of cushion back, $6-10)
- Velcro strips for securing cushion to base (optional, $5)
- Non-slip rug pad cut to size (prevents sliding, $8-12)
- Tools:
- Sewing machine (standard home machine works fine)
- Measuring tape and fabric scissors
- Straight pins and safety pins
- Iron for pressing seams
- Fabric marker or chalk
- Electric carving knife or serrated bread knife (for cutting foam)
Creating Your Window Seat
- Measure Precisely: Measure your window seat area's length, depth, and account for any trim or molding that might affect fit—subtract about half an inch from each dimension so your cushion sits perfectly without looking squeezed or leaving awkward gaps.
- Cut the Foam: Use an electric carving knife or long serrated bread knife to cut your high-density foam to exact measurements, working slowly and using a straightedge as a guide to keep cuts clean and square—this determines your final cushion shape.
- Wrap in Batting: Drape batting over your foam cushion and trim it so it wraps around all sides with about 2 inches of overlap, then temporarily secure with safety pins—this creates that plush, rounded edge look and prevents the foam texture from showing through fabric.
- Cut Fabric Pieces: Cut your top panel to cushion dimensions plus 1 inch on all sides for seam allowance, cut bottom panel the same size, then cut a long strip 5 inches wide for the boxing (side border) that wraps around the entire perimeter.
- Install the Zipper: Sew your heavy-duty zipper into the back section of the boxing strip before assembling the cover, positioning it to run most of the back length—this hidden zipper lets you remove the cover for washing while keeping the professional look intact.
- Assemble the Cover: Pin and sew the boxing strip around the perimeter of your top panel with right sides together, clip corners to reduce bulk, then attach the bottom panel the same way, leaving the zippered section open so you can turn everything right-side out.
- Insert Cushion: Open the zipper completely, carefully work your batting-wrapped foam into the cover (this takes patience and some wrestling), then zip it closed and fluff the corners into place—the tight fit is what creates that professional upholstered appearance.
- Create Storage Base: Position storage crates or your built wooden box under the window seat area, add rope handles or pulls to the front for easy access, then place your finished cushion on top with non-slip pad underneath to keep everything stable while you're sitting.
Interior designers know that the secret to a truly luxurious window seat is layering multiple cushion densities for optimal comfort. Instead of using a single 4-inch foam, professionals often stack a 3-inch high-density foam base (firm support) topped with a 1-inch memory foam or down-alternative layer (soft comfort), wrapping both together in batting before covering. This creates that "sink into it but still supported" feel that makes window seats irresistible. For the storage component, consider building a hinged top instead of using separate bins—a simple wooden frame with piano hinge creates a lift-up seat where your cushion sits on top and the entire interior becomes accessible storage, giving you way more capacity than individual boxes while maintaining clean lines. If you're worried about sewing skills, start with a simple envelope-style cover with overlapping back panels instead of a zipper—it's more forgiving for beginners and still completely removable for washing.